Setting up MuseTalk inside ComfyUI enables high-fidelity, real-time audio-driven lip synchronization directly within a visual, node-based workflow.
This zero-to-hero guide provides the complete, tested walkthrough for running MuseTalk in ComfyUI. We documented and verified this setup on an NVIDIA GeForce RTX 4090 with 24 GB VRAM, and previously tested and confirmed full operation on an NVIDIA GeForce RTX 3090 with 24 GB VRAM. Readers with equivalent local hardware can execute this setup directly on their own machine, while cloud users can deploy on on-demand GPU instances in minutes.
MuseTalk Resources to Get Started
Get the verified setup package and tested workflow assets before beginning:
| Asset | Description | Link |
|---|---|---|
| MuseTalk ComfyUI Easy v2 Package | Custom node bundle, automated installer, isolated environment scripts, and runtime configuration | musetalk-comfyui-easy-v2.zip |
| Tested Workflow & Starter Inputs | Exported musetalk-easy-v2.json workflow, starter portrait image, and speech sample |
MuseTalk-ComfyUI-Workflow-Samples.zip |
| RTX 4090 Benchmark Output | Raw 5-second generated video file produced during our recorded test run | musetalk-comfyui-rtx4090-easy-ui-output.mp4 |
Hardware Specifications & Compatibility
MuseTalk 1.5 combines multiple neural architectures: an SD-VAE autoencoder, a Whisper audio feature extractor, DWPose facial landmark detection, and an audio-conditioned UNet generator. Because these models run concurrently during inference, available VRAM and CUDA capabilities dictate generation speed and batch capacity.
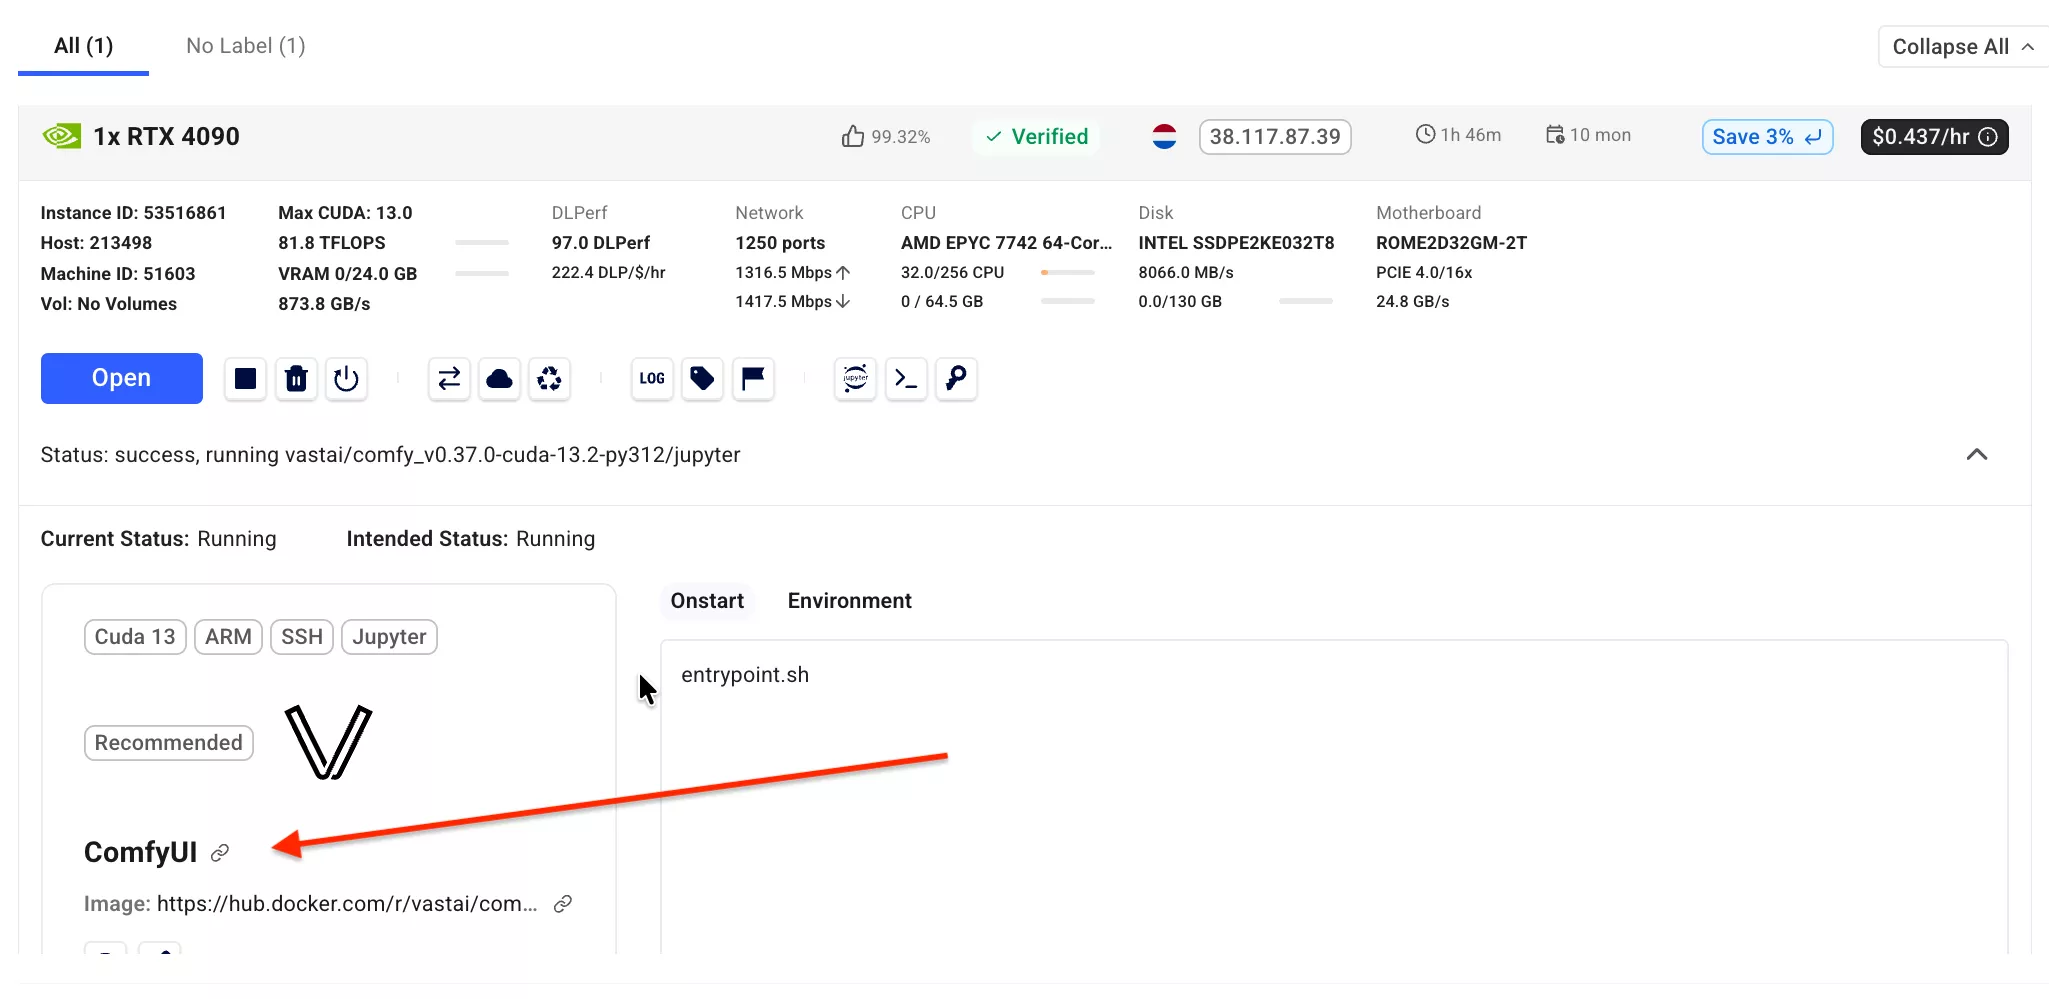
Review the hardware requirements below to decide between running locally or provisioning a cloud GPU:
| Configuration Tier | GPU & VRAM | Supported Settings & Expected Performance |
|---|---|---|
| Recommended / Tested | NVIDIA GeForce RTX 4090 (24 GB VRAM) or RTX 3090 (24 GB VRAM) |
Full resolution (512×512), Balanced preset, batch size 2, FP16 precision. Real-time generation throughput with zero VRAM bottlenecks. |
| Mid-Range Workstation | NVIDIA RTX 4080 / RTX 3080 (12 GB – 16 GB VRAM) | Balanced or Low VRAM preset, batch size 1 to 2, clips up to 15 seconds. Ensure background diffusion models are unloaded from memory. |
| Entry-Level / Minimum | NVIDIA GPU with 8 GB VRAM (RTX 3060 / 4060) | Low VRAM preset, batch size 1, FP16 precision, short speech clips (3 to 5 seconds). Suitable for testing and basic clip generation. |
| macOS / AMD / Intel iGPU | Apple Silicon (M-series) / Non-NVIDIA | Native CUDA acceleration is required. Mac users should run ComfyUI via a remote Linux GPU instance or test in browser via our Online Playground. |
Verifying Your GPU with nvidia-smi
Before executing setup, confirm that your operating system detects the NVIDIA driver and dedicated VRAM:
nvidia-smi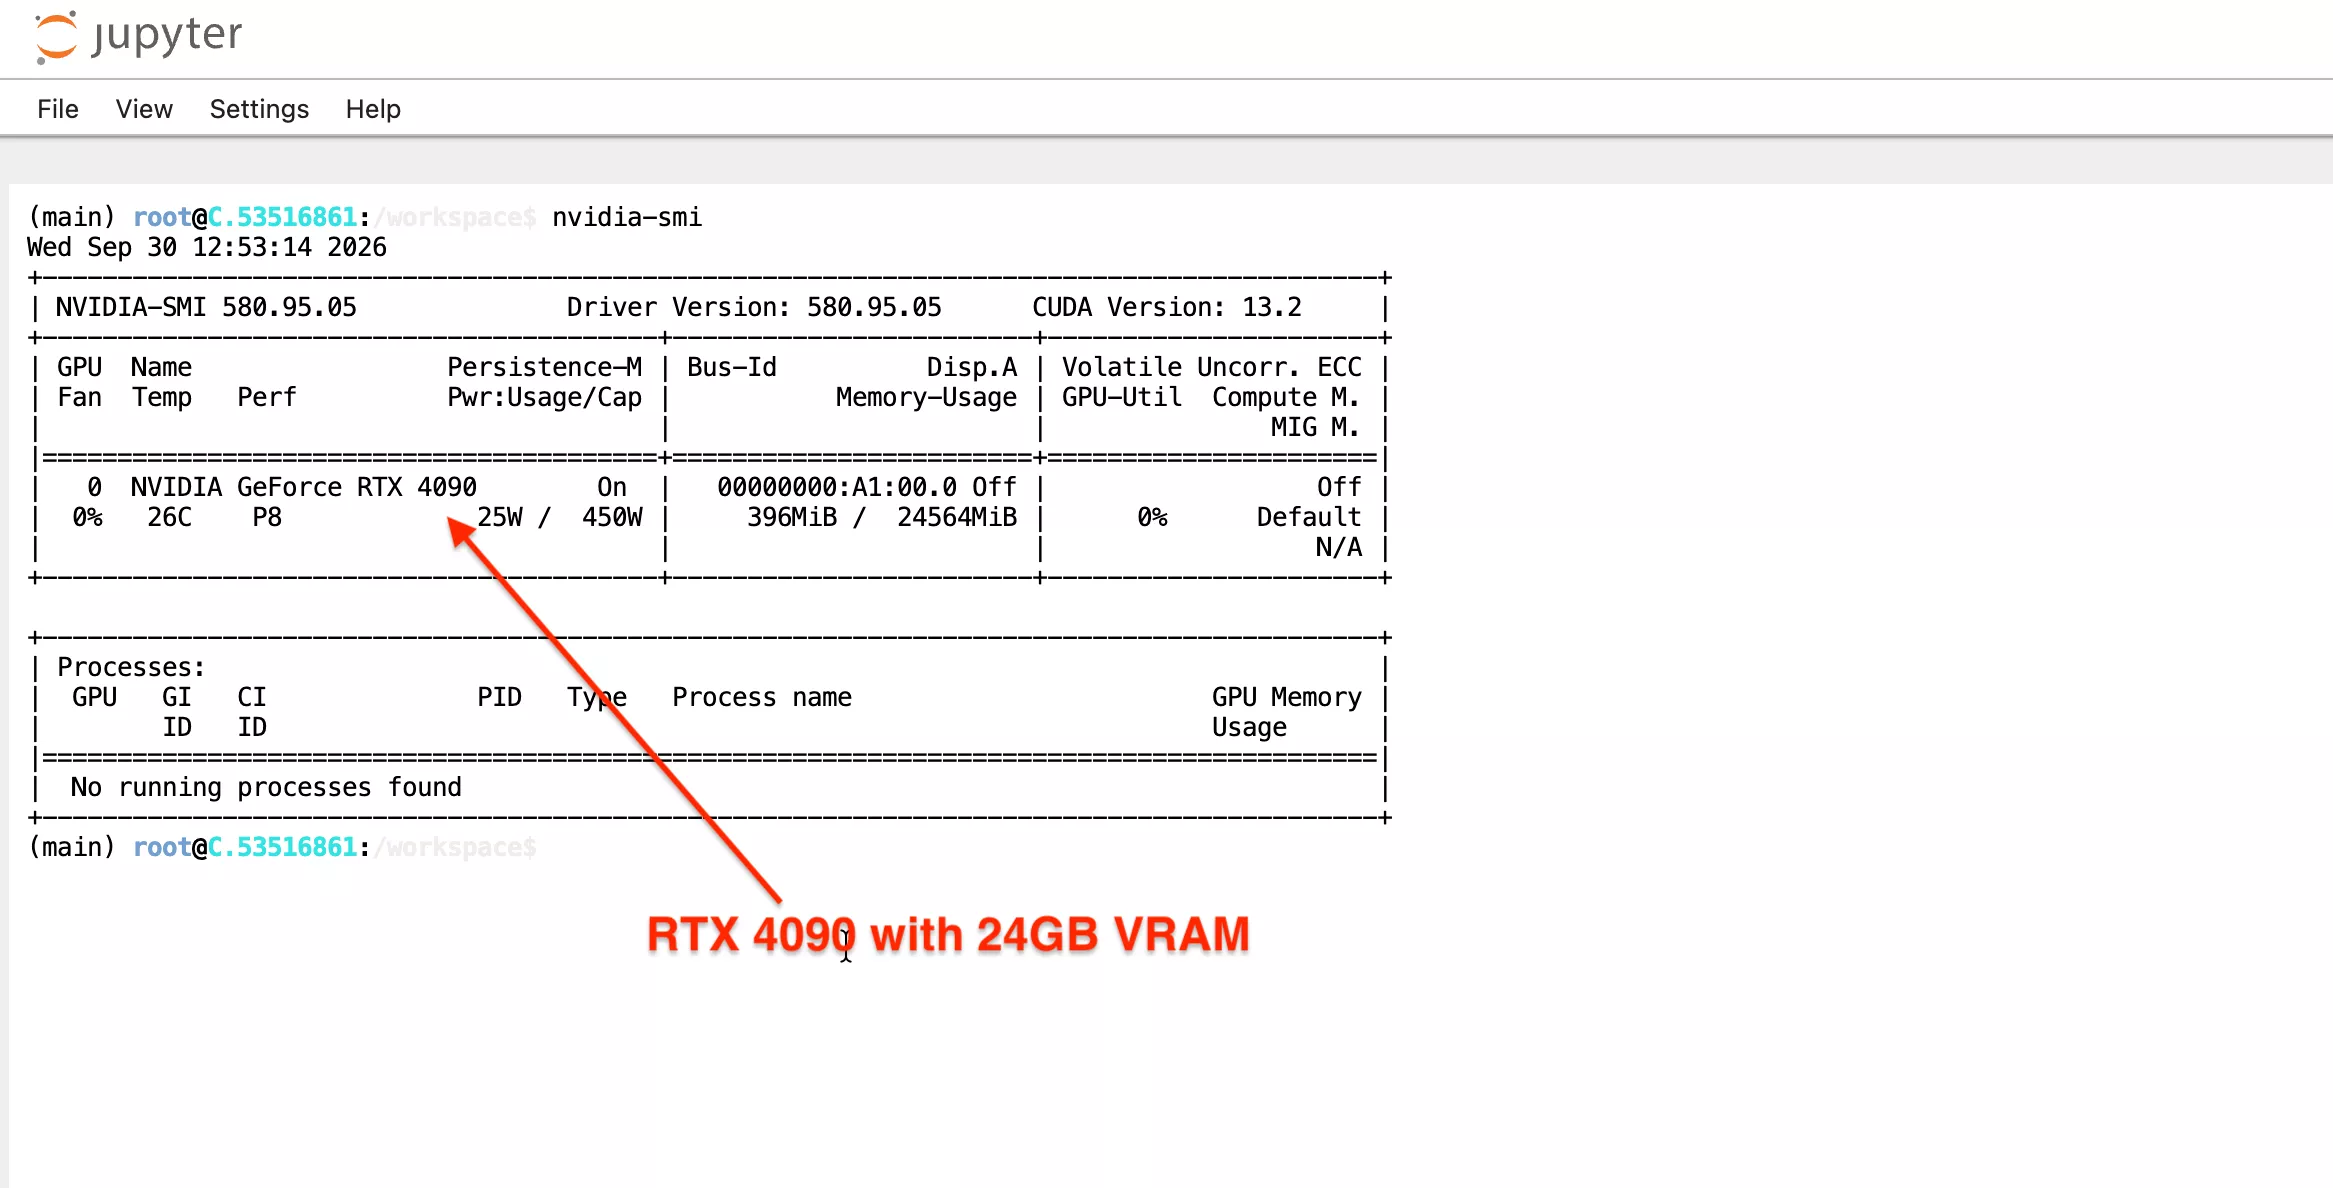
If you are working on your own local Linux workstation equipped with an RTX 4090 or RTX 3090, you can follow every command directly inside your local terminal. If you are using an on-demand cloud provider such as Vast.ai or RunPod, choose an Ubuntu 22.04 base template with PyTorch and CUDA pre-installed.
Why Traditional ComfyUI MuseTalk Nodes Broke
Older third-party community custom nodes attempted to install MuseTalk’s full dependency stack directly into ComfyUI’s root Python virtual environment. This created recurring breakages:
- MMLab Conflicts: MuseTalk requires specific legacy builds of MMCV, MMEngine, and MMPose compiled against PyTorch 2.0.1+cu118. Updating ComfyUI or installing other modern diffusion nodes often silently upgraded PyTorch to 2.2+, causing MMCV C++ extensions to crash.
- Hugging Face Hub Incompatibilities: MuseTalk requires pinned transformers and huggingface-hub versions. Modern ComfyUI nodes expecting huggingface-hub 1.x would overwrite these libraries, breaking model weight loaders.
- Manual Weight Misplacement: Earlier nodes required users to manually sort six different weight repositories across nested diffusers subdirectories, where a single misspelled path resulted in silent failures.
The Isolated Backend Solution
Our Easy UI update decouples the system into two distinct layers:
- ComfyUI Host Environment: Retains its standard Python packages, web interface, and workflow management unchanged. No packages are forcefully upgraded or overwritten.
- Dedicated MuseTalk Runtime (
muse-env): A standalone Python 3.10.18 virtual environment located at/workspace/musetalkai/muse-env. This environment holds the exact pinned PyTorch 2.0.1, MMCV 2.0.1, Whisper, and official MuseTalk 1.5 dependencies. - Custom Node Bridge (
MuseTalkAIEasy): When you click Run in ComfyUI, the node passes parameters and file paths to the isolated runtime through a clean subprocess bridge, captures real-time progress, and returns the finished video directly to the canvas player.
Step-by-Step MuseTalk ComfyUI Guide: Zero to Hero
Step 1: Access Your Running ComfyUI
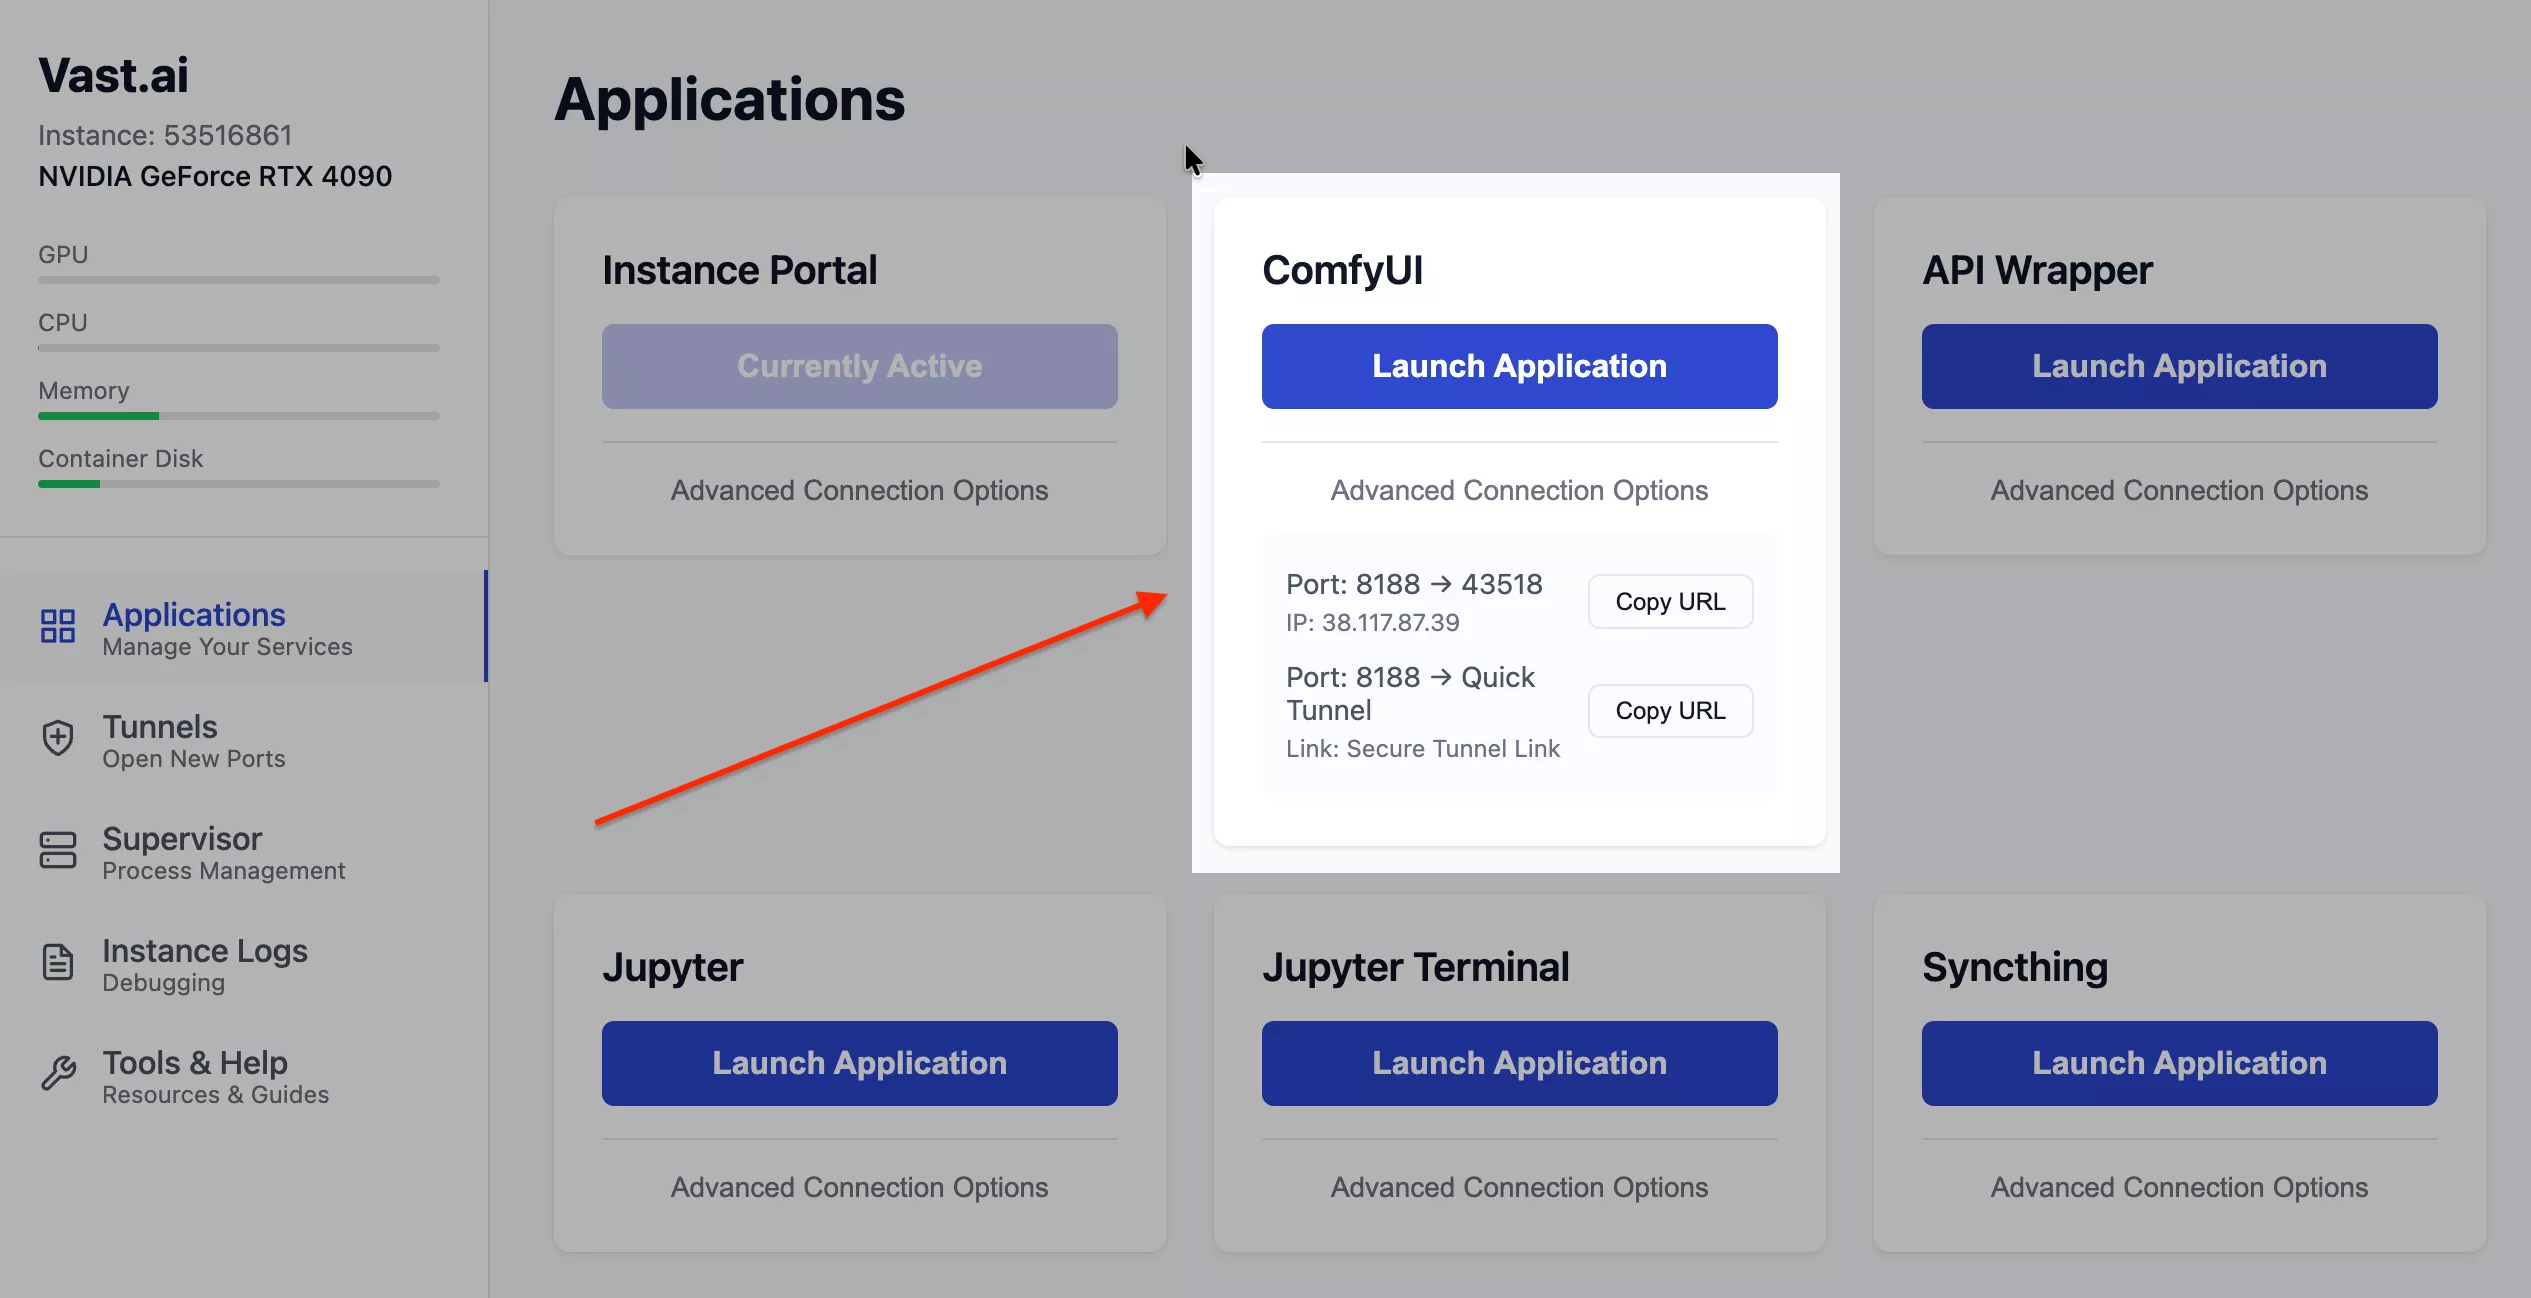
Ensure your ComfyUI server is running. On a local machine, open your browser to your local address (typically http://127.0.0.1:8188). If you are using a cloud GPU instance on Vast.ai, simply click Launch Application next to your running instance to open ComfyUI directly in your browser. You do not need to configure manual SSH tunnels or modify reverse proxy ports.
Step 2: Upload the Setup Package
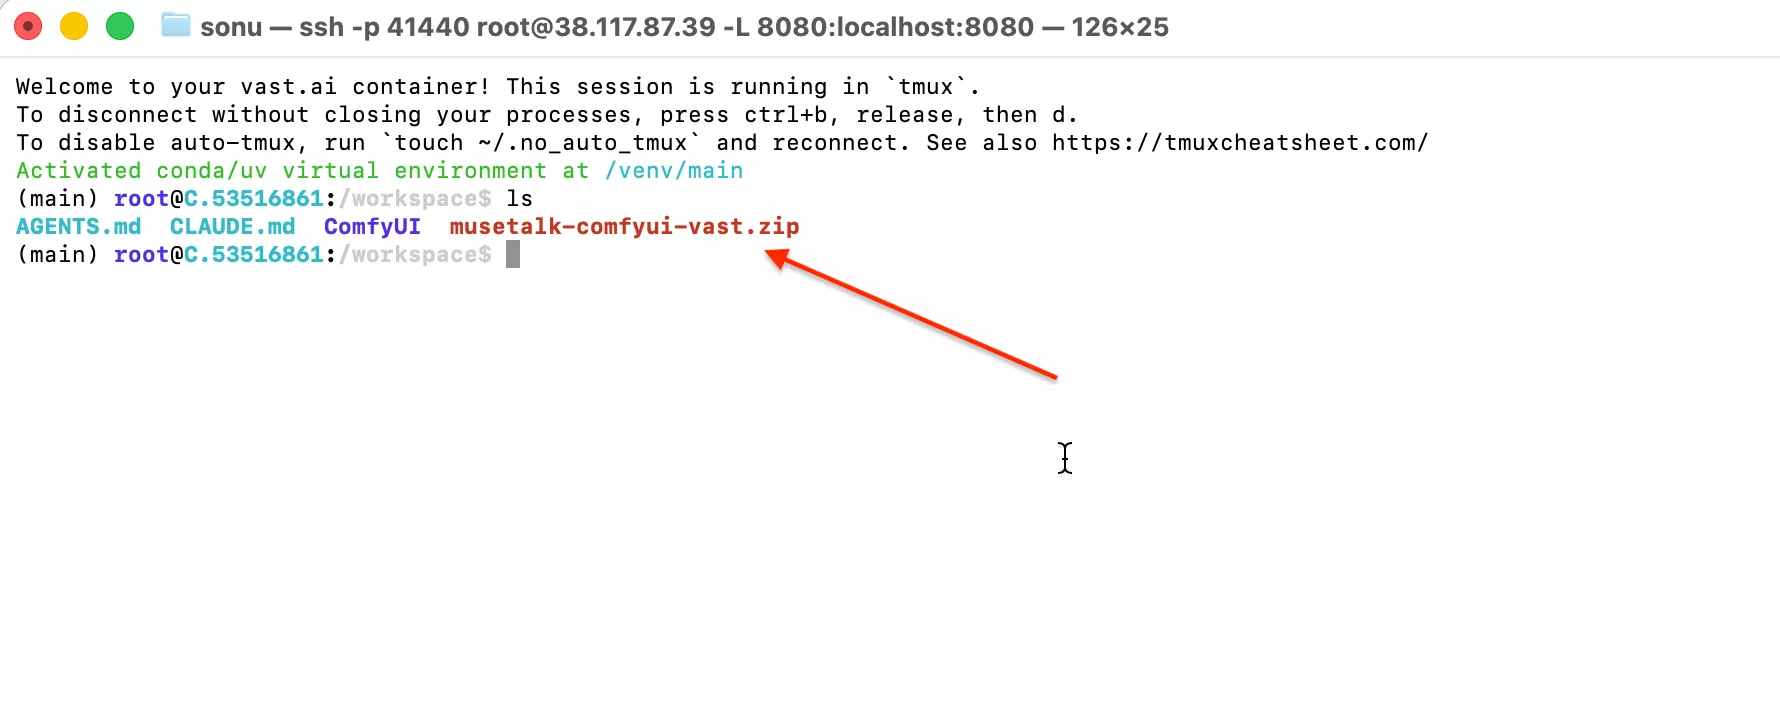
Get the musetalk-comfyui-easy-v2.zip package. Upload the archive into your instance workspace folder (e.g. /workspace) using your cloud instance file manager, Jupyter interface, or secure file transfer (SCP).
Step 3: Extract and Install into ComfyUI
Open your terminal and choose the appropriate installation route below:
Route A: Quick Attach to an Existing Working ComfyUI
If you already have ComfyUI and the MuseTalk backend models installed, attach the updated Easy UI custom node with a single installer script. This backs up any previous node version and registers the new workflows:
cd /workspace
python3 -m zipfile -e musetalk-comfyui-easy-v2.zip /workspace
python3 /workspace/musetalk-comfyui-easy-v2/install_into_comfy.py \
  --comfy /workspace/ComfyUI \
  --base /workspace/musetalkai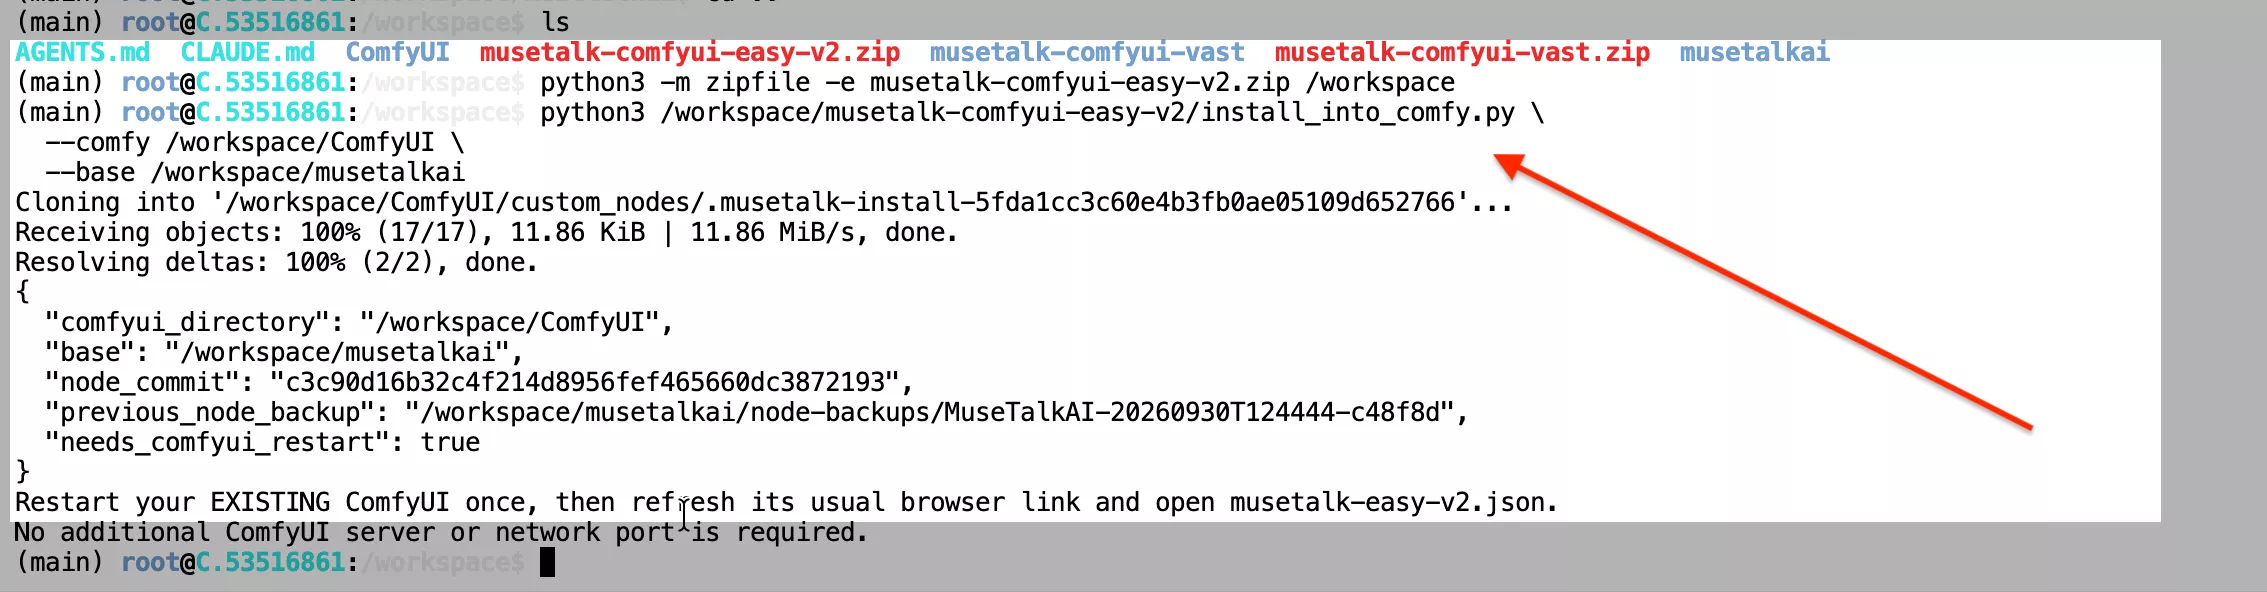
Route B: Full Automated Setup on a Fresh Machine (setup.sh)
If you are setting up on a clean GPU instance or local machine without the backend installed, run the automated setup script. This script installs required system libraries (FFmpeg, libsndfile1), bootstraps Python 3.10 via uv, creates the isolated muse-env virtual environment, clones the official MuseTalk repository, and automatically setup and verifies all model weights:
cd /workspace/musetalk-comfyui-easy-v2
COMFYUI_DIR=/workspace/ComfyUI MUSETALK_BASE=/workspace/musetalkai bash setup.sh
For full manual weight details and file manifests, consult our dedicated MuseTalk Model Weights Guide and Linux Installation Guide.
Step 4: Restart the ComfyUI Service
ComfyUI discovers custom nodes only during initial server startup. Refreshing your browser tab without restarting the backend process will not register the node. In your ComfyUI interface, navigate to Manager → Restart, or restart the ComfyUI process in your cloud supervisor panel.
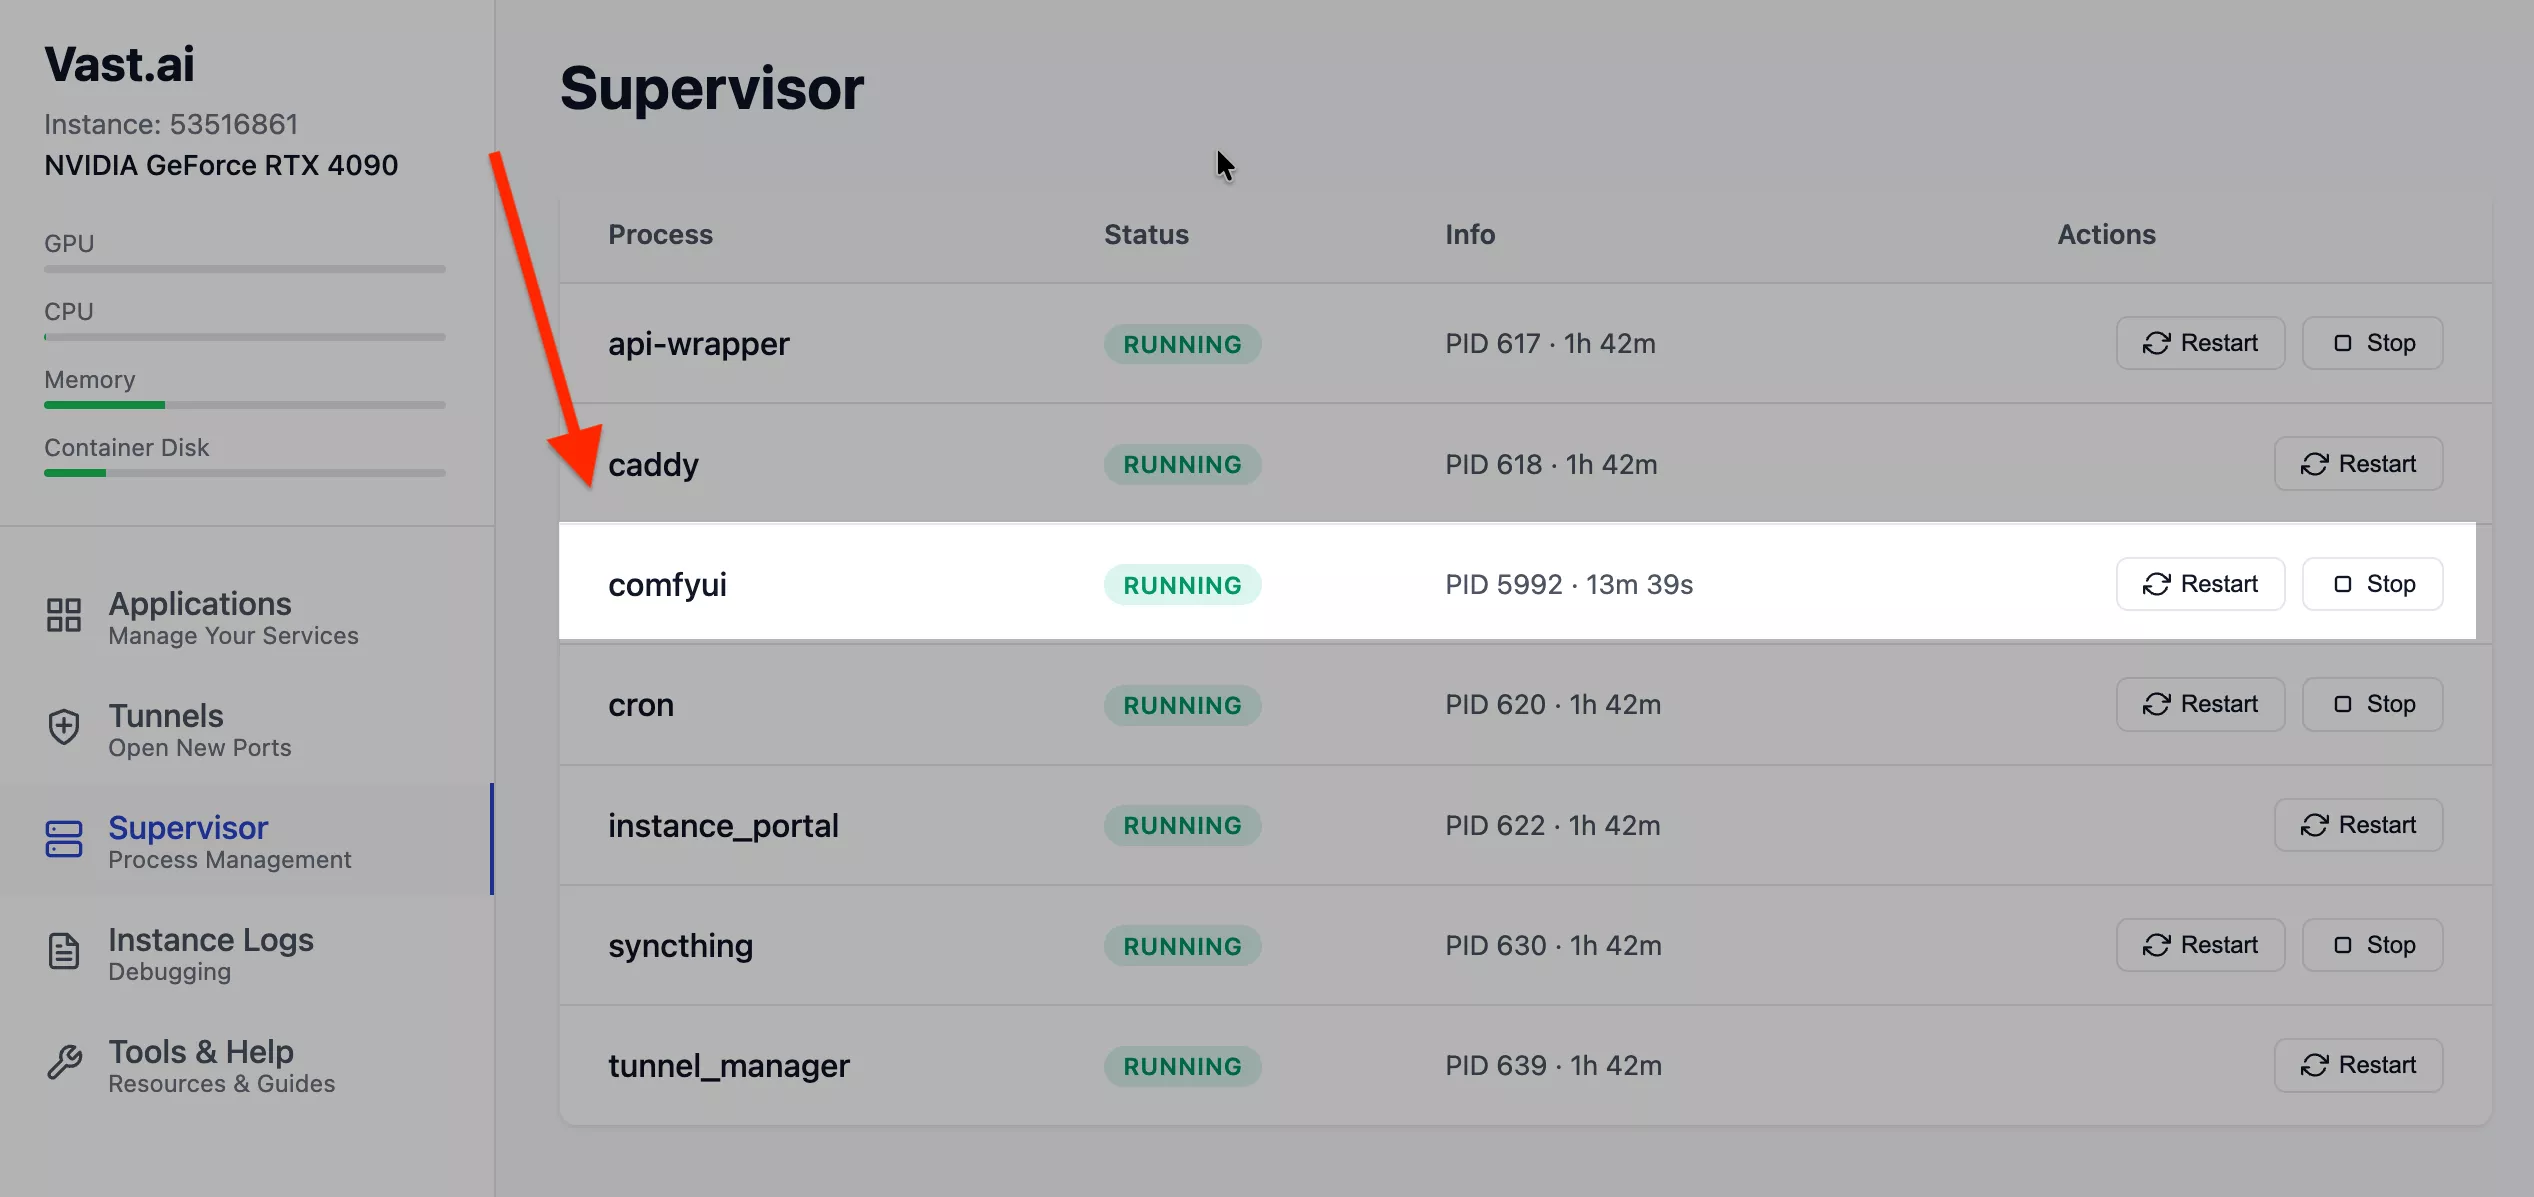
To verify from the command line that the node loaded successfully:
curl -sS http://127.0.0.1:18188/object_info/MuseTalkAIEasy | head -n 20A successfully registered node will return its JSON input schema instead of an empty dictionary {}.
Step 5: Load the MuseTalk Easy v2 Workflow
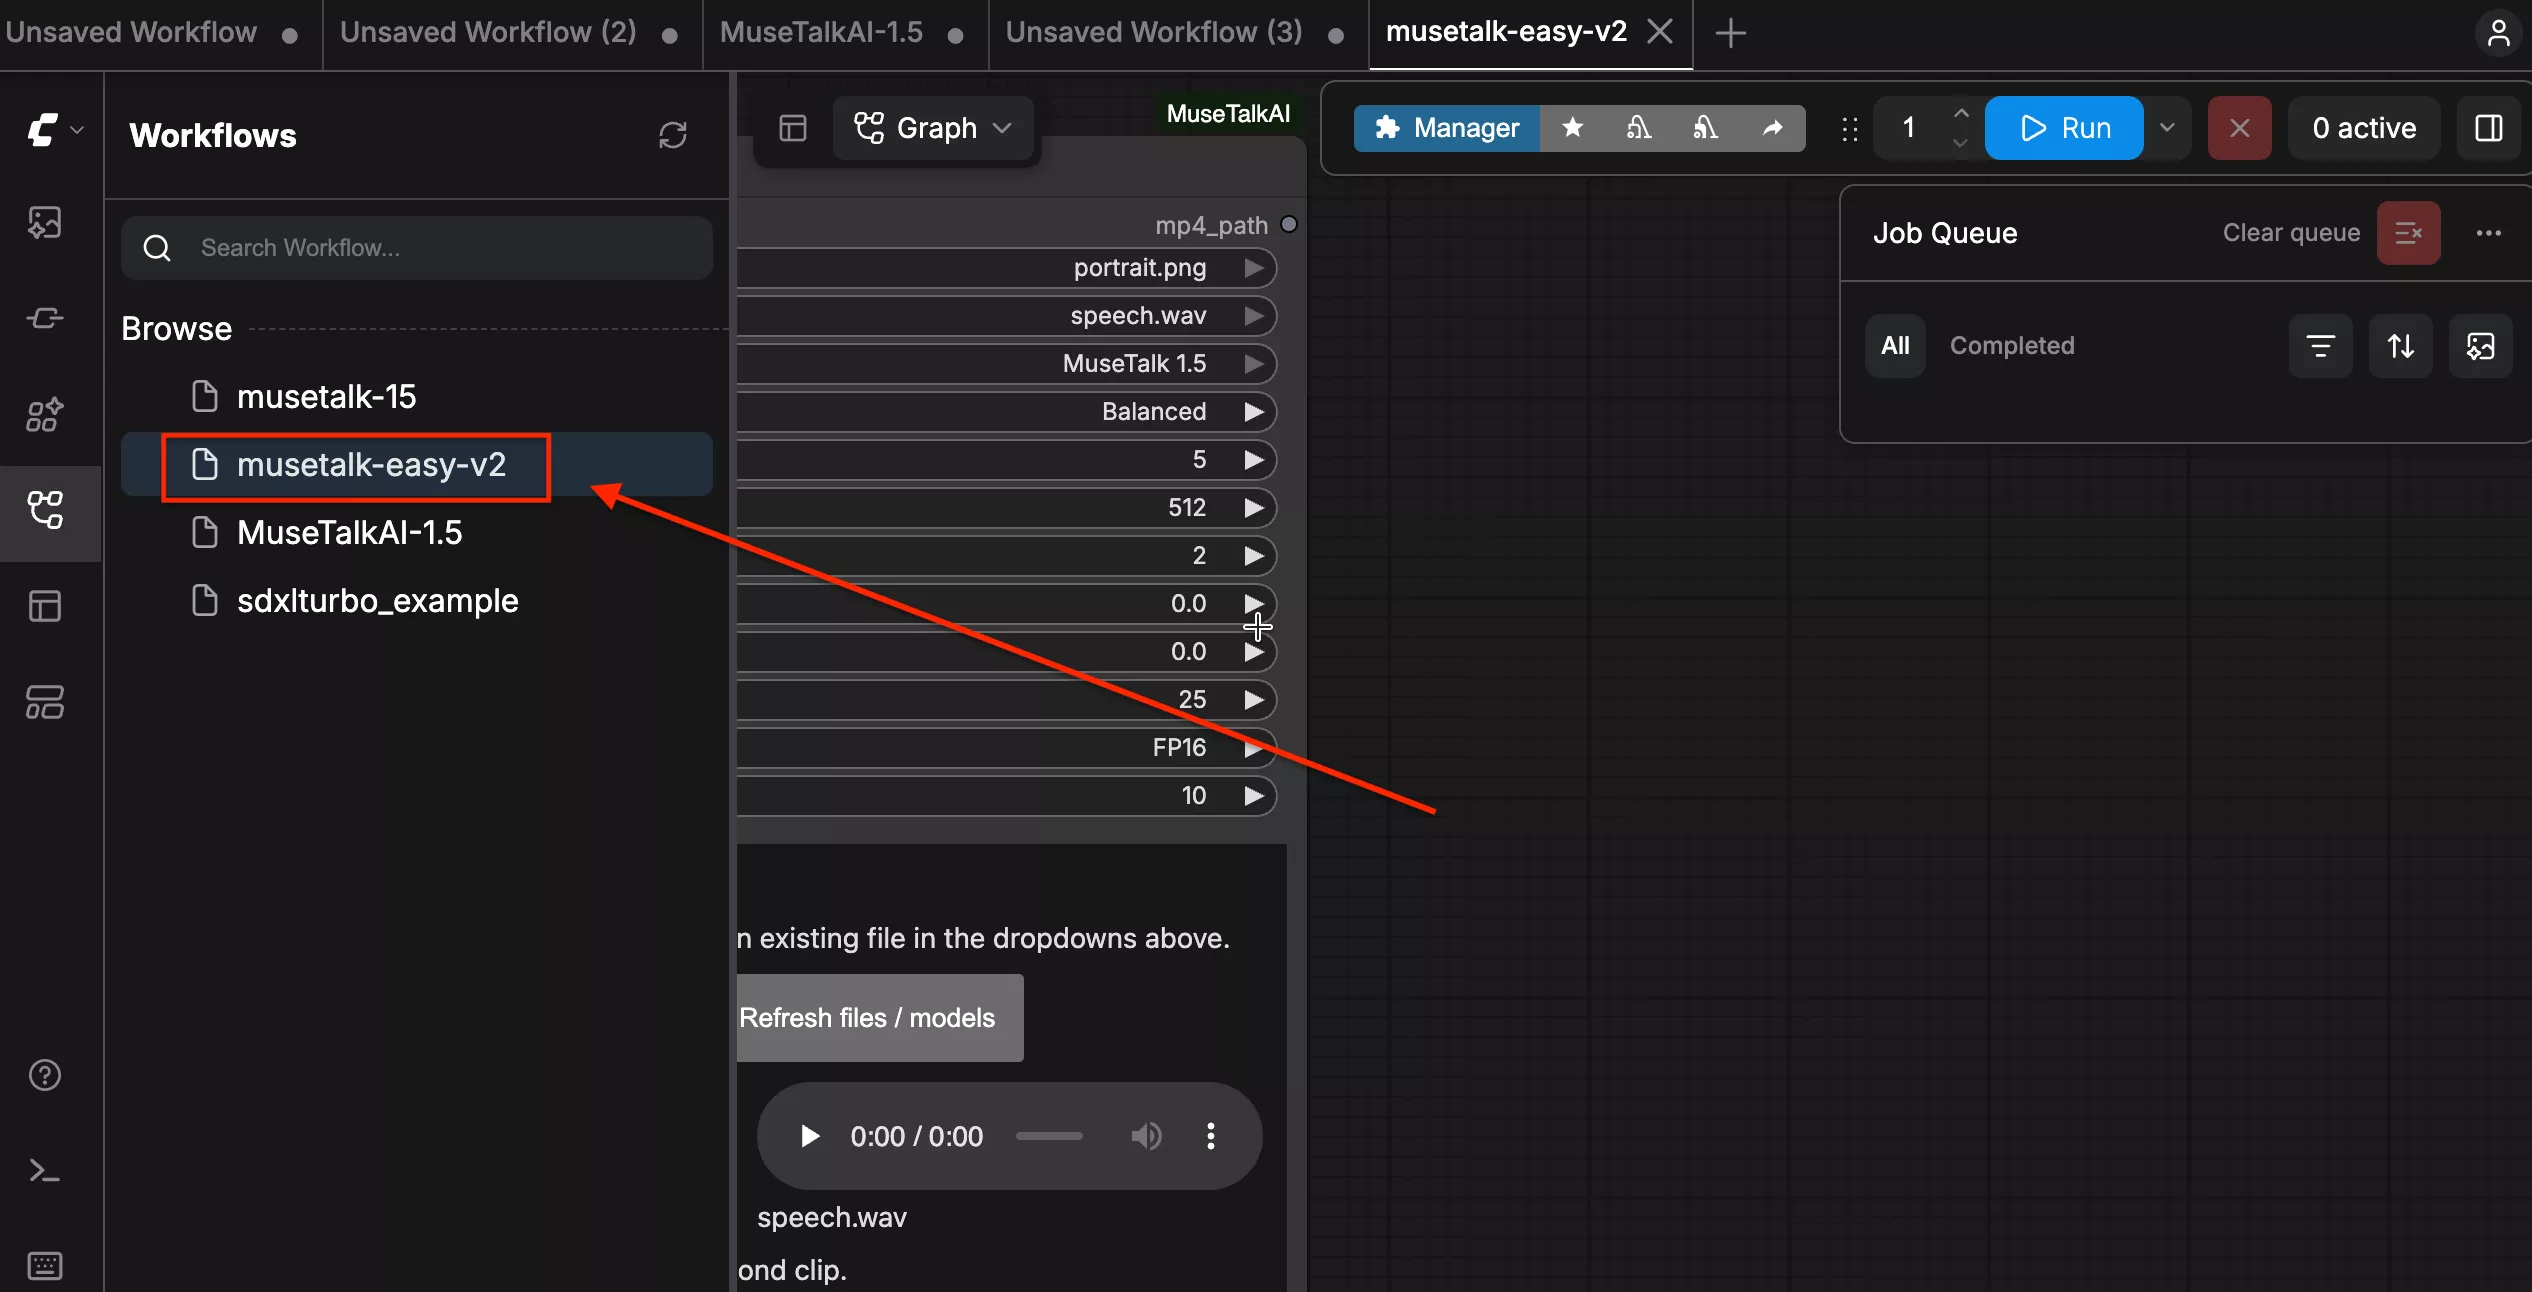
Refresh your browser. In ComfyUI, open the workflow list and select musetalk-easy-v2.json. Alternatively, drag and drop the musetalk-easy-v2.json file included in the setup archive directly onto the ComfyUI canvas.
Step 6: Upload Face and Speech Inputs
The Easy UI node features dedicated file picker buttons directly on the node canvas:
- Click Upload face and choose a portrait photo (PNG or JPG) or an existing portrait video (MP4) from your local computer.
- Click Upload speech and select your audio speech file (16kHz WAV is recommended; MP3 is fully supported).
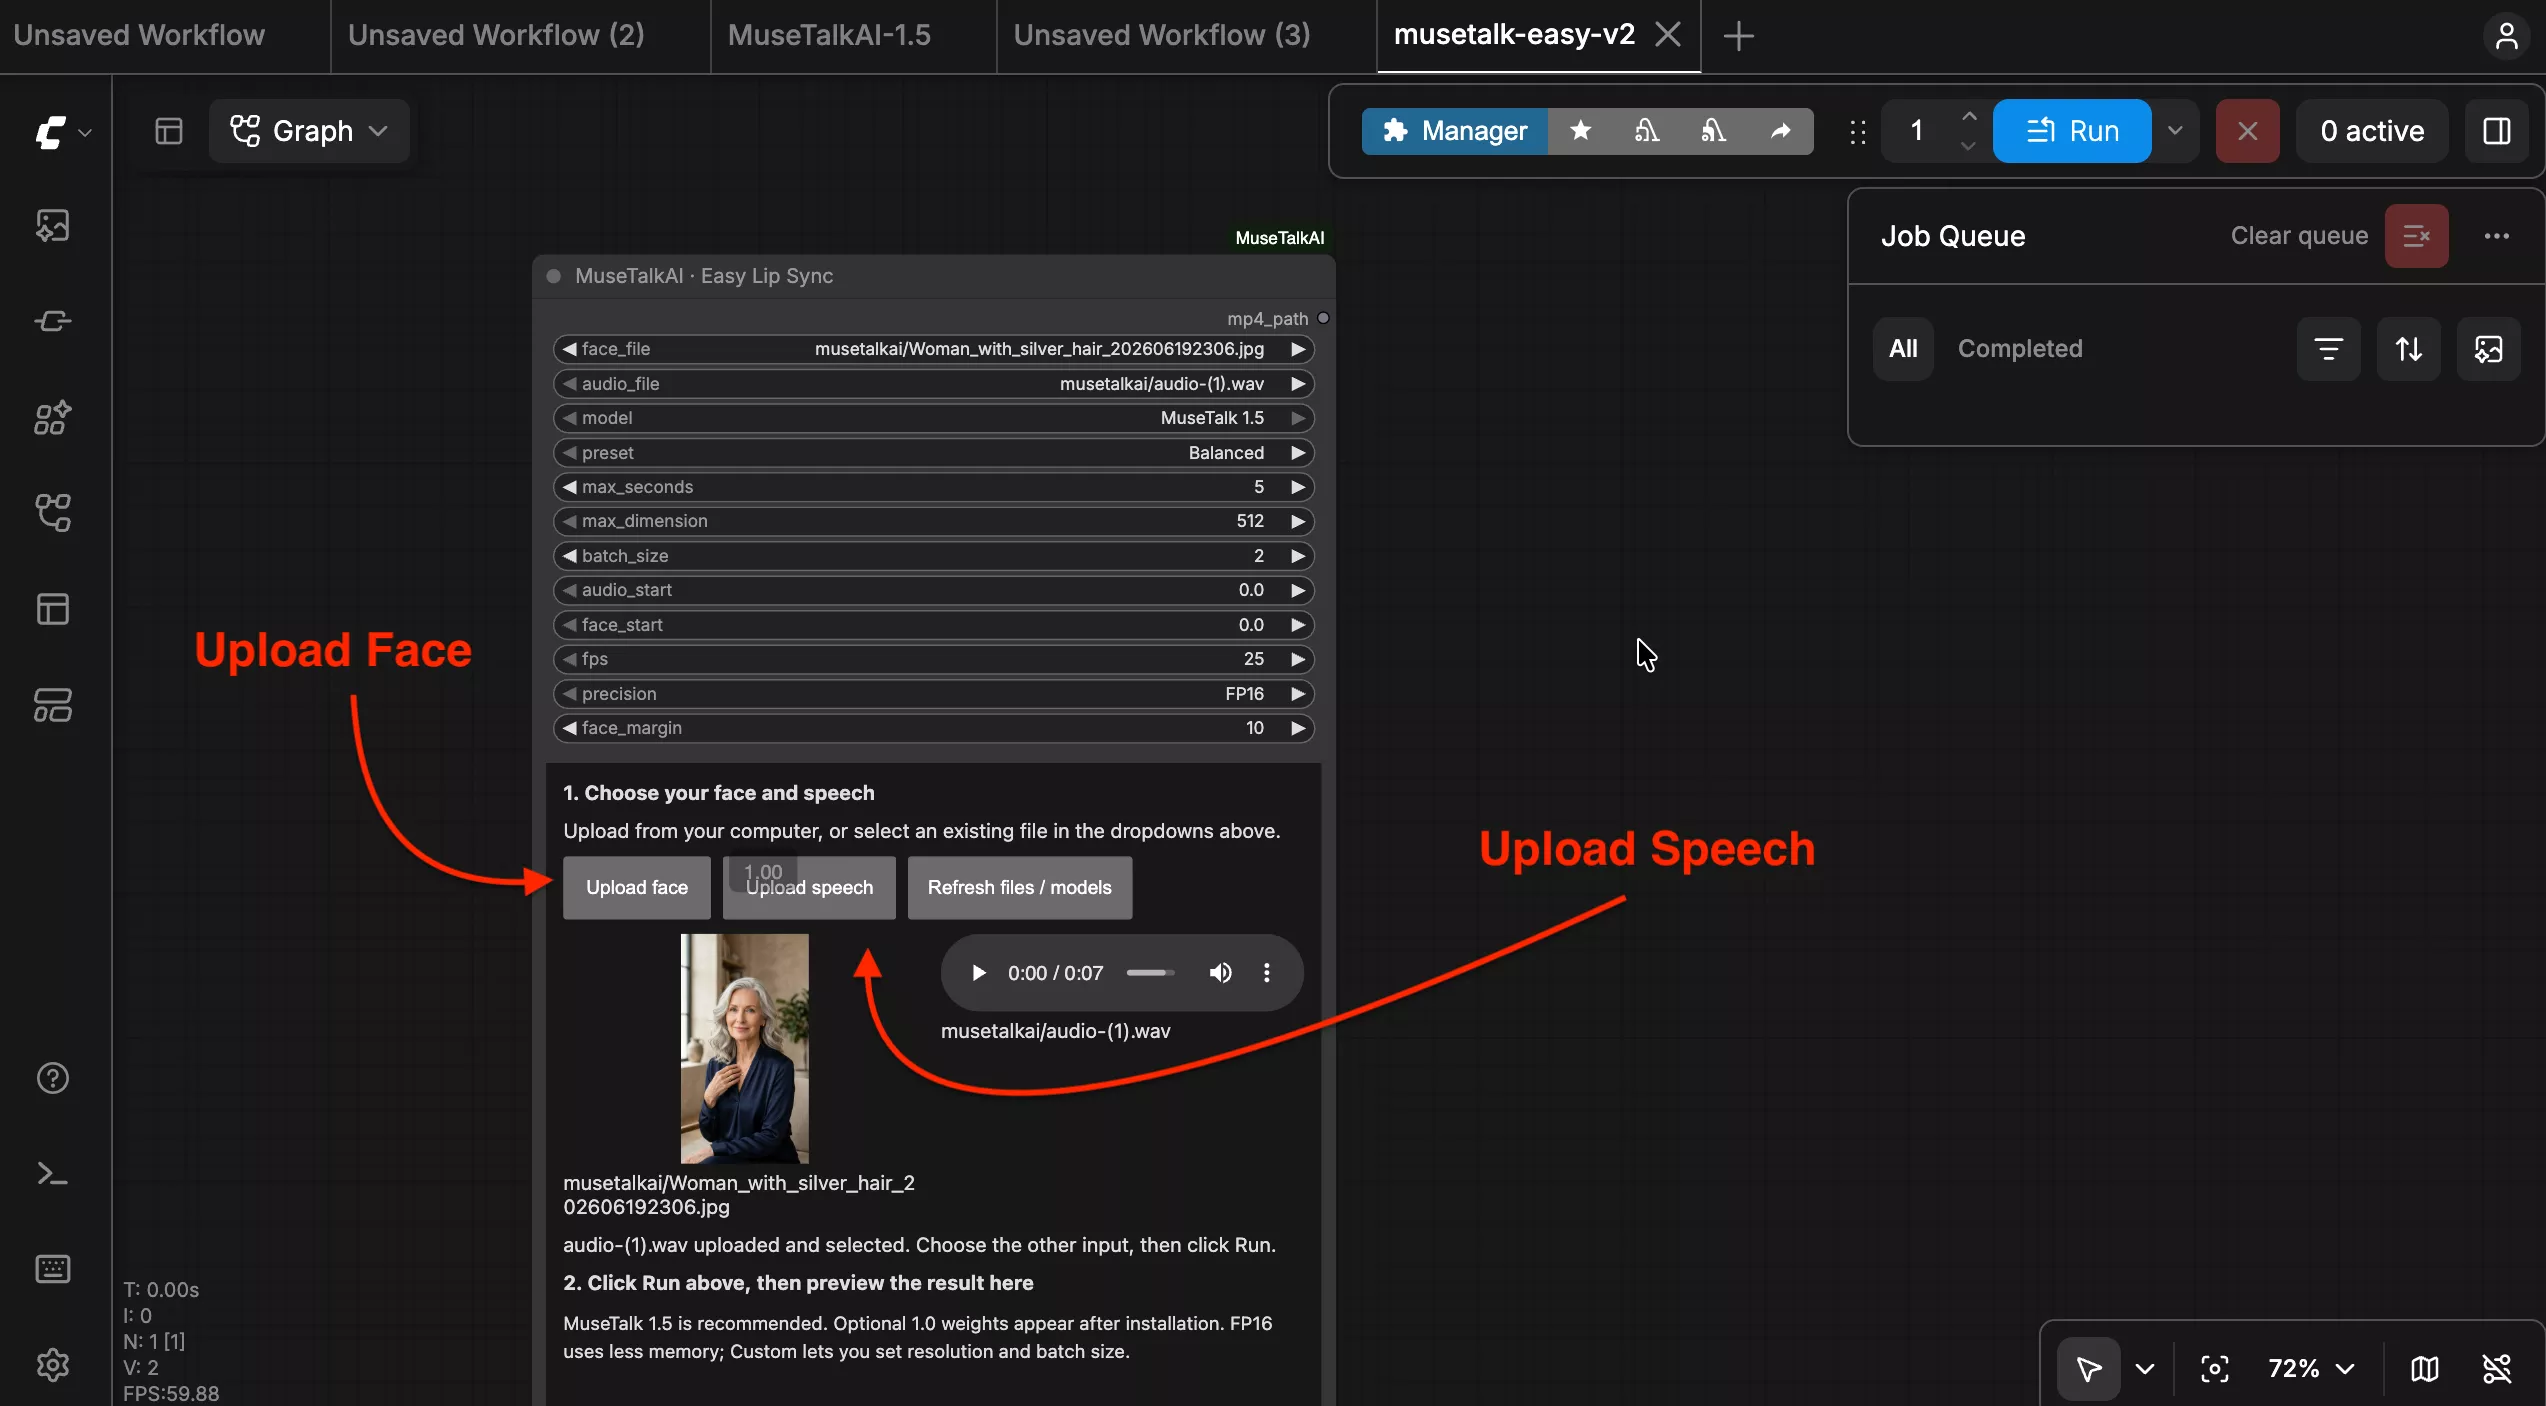
Files upload directly to input/musetalkai/ inside your ComfyUI installation. You can reuse previously uploaded assets at any time via the face and audio dropdown menus without uploading them again. The web interface supports uploads up to 50 MB per file.
Step 7: Configure Generation Settings & Presets
The node provides intuitive presets alongside fine-grained controls for timing, precision, and framing:
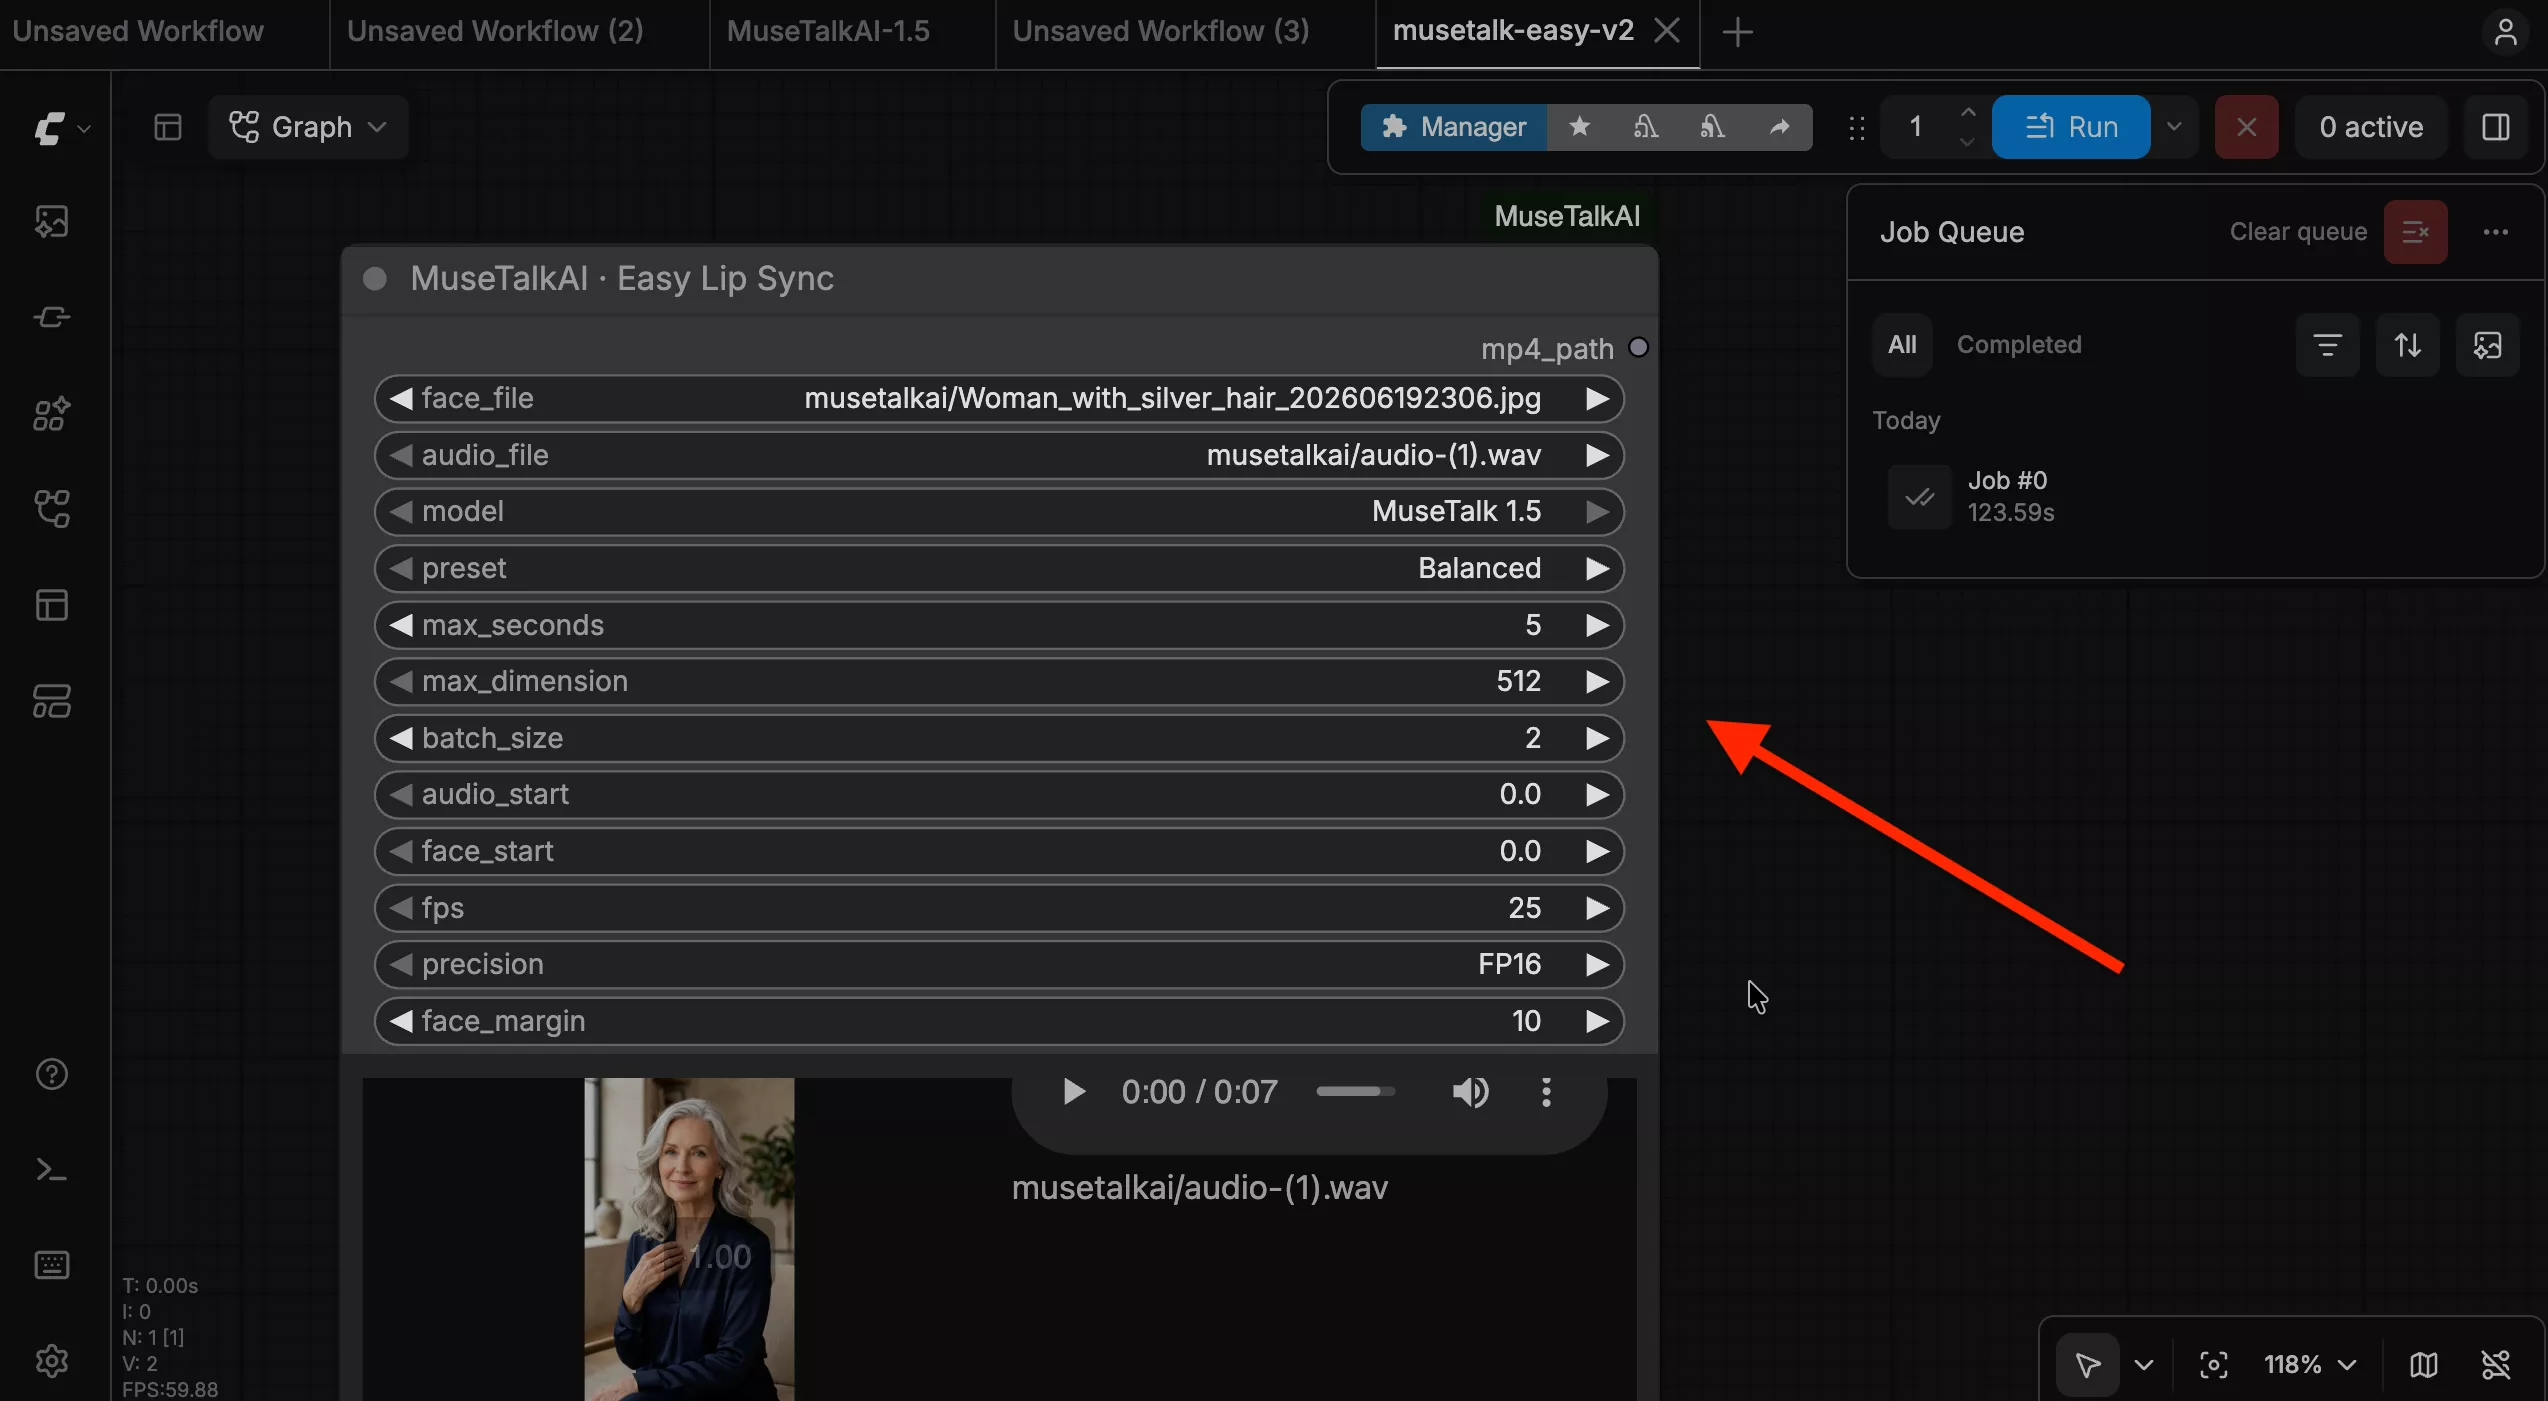
| Setting | Default Value | Description & Recommendation |
|---|---|---|
| model | MuseTalk 1.5 |
Only verified, installed models appear in this selector. MuseTalk 1.5 provides the sharpest facial detail and most accurate lip closure. |
| preset | Balanced |
Balanced sets 512px maximum dimension and batch size 2. Low VRAM sets 512px and batch size 1 for 8 GB–12 GB GPUs. Custom enables manual dimension and batch size controls. |
| max_seconds | 5 |
Limits generated video duration between 1 and 30 seconds. Audio is trimmed cleanly; shorter clips are not padded. |
| audio_start | 0.0 |
Skips the specified number of seconds from the beginning of the speech file before processing. |
| face_start | 0.0 |
Skips the specified number of seconds from the beginning of a face video. Ignored when using a still photo. |
| fps | 25 |
Generation framerate: 24, 25, or 30 FPS. Standard MuseTalk models are trained at 25 FPS. |
| precision | FP16 |
Half-precision floating point reduces VRAM usage significantly while preserving visual quality. Use FP32 only for hardware diagnostics. |
| face_margin | 10 |
Expands the bounding box around the detected mouth region (0 to 40). Retain default value 10 for natural boundary blending. |
Step 8: Queue Inference & Monitor Execution
Click ComfyUI’s standard Queue Prompt or Run button. The canvas highlights the active execution, and progress updates stream in the server log.
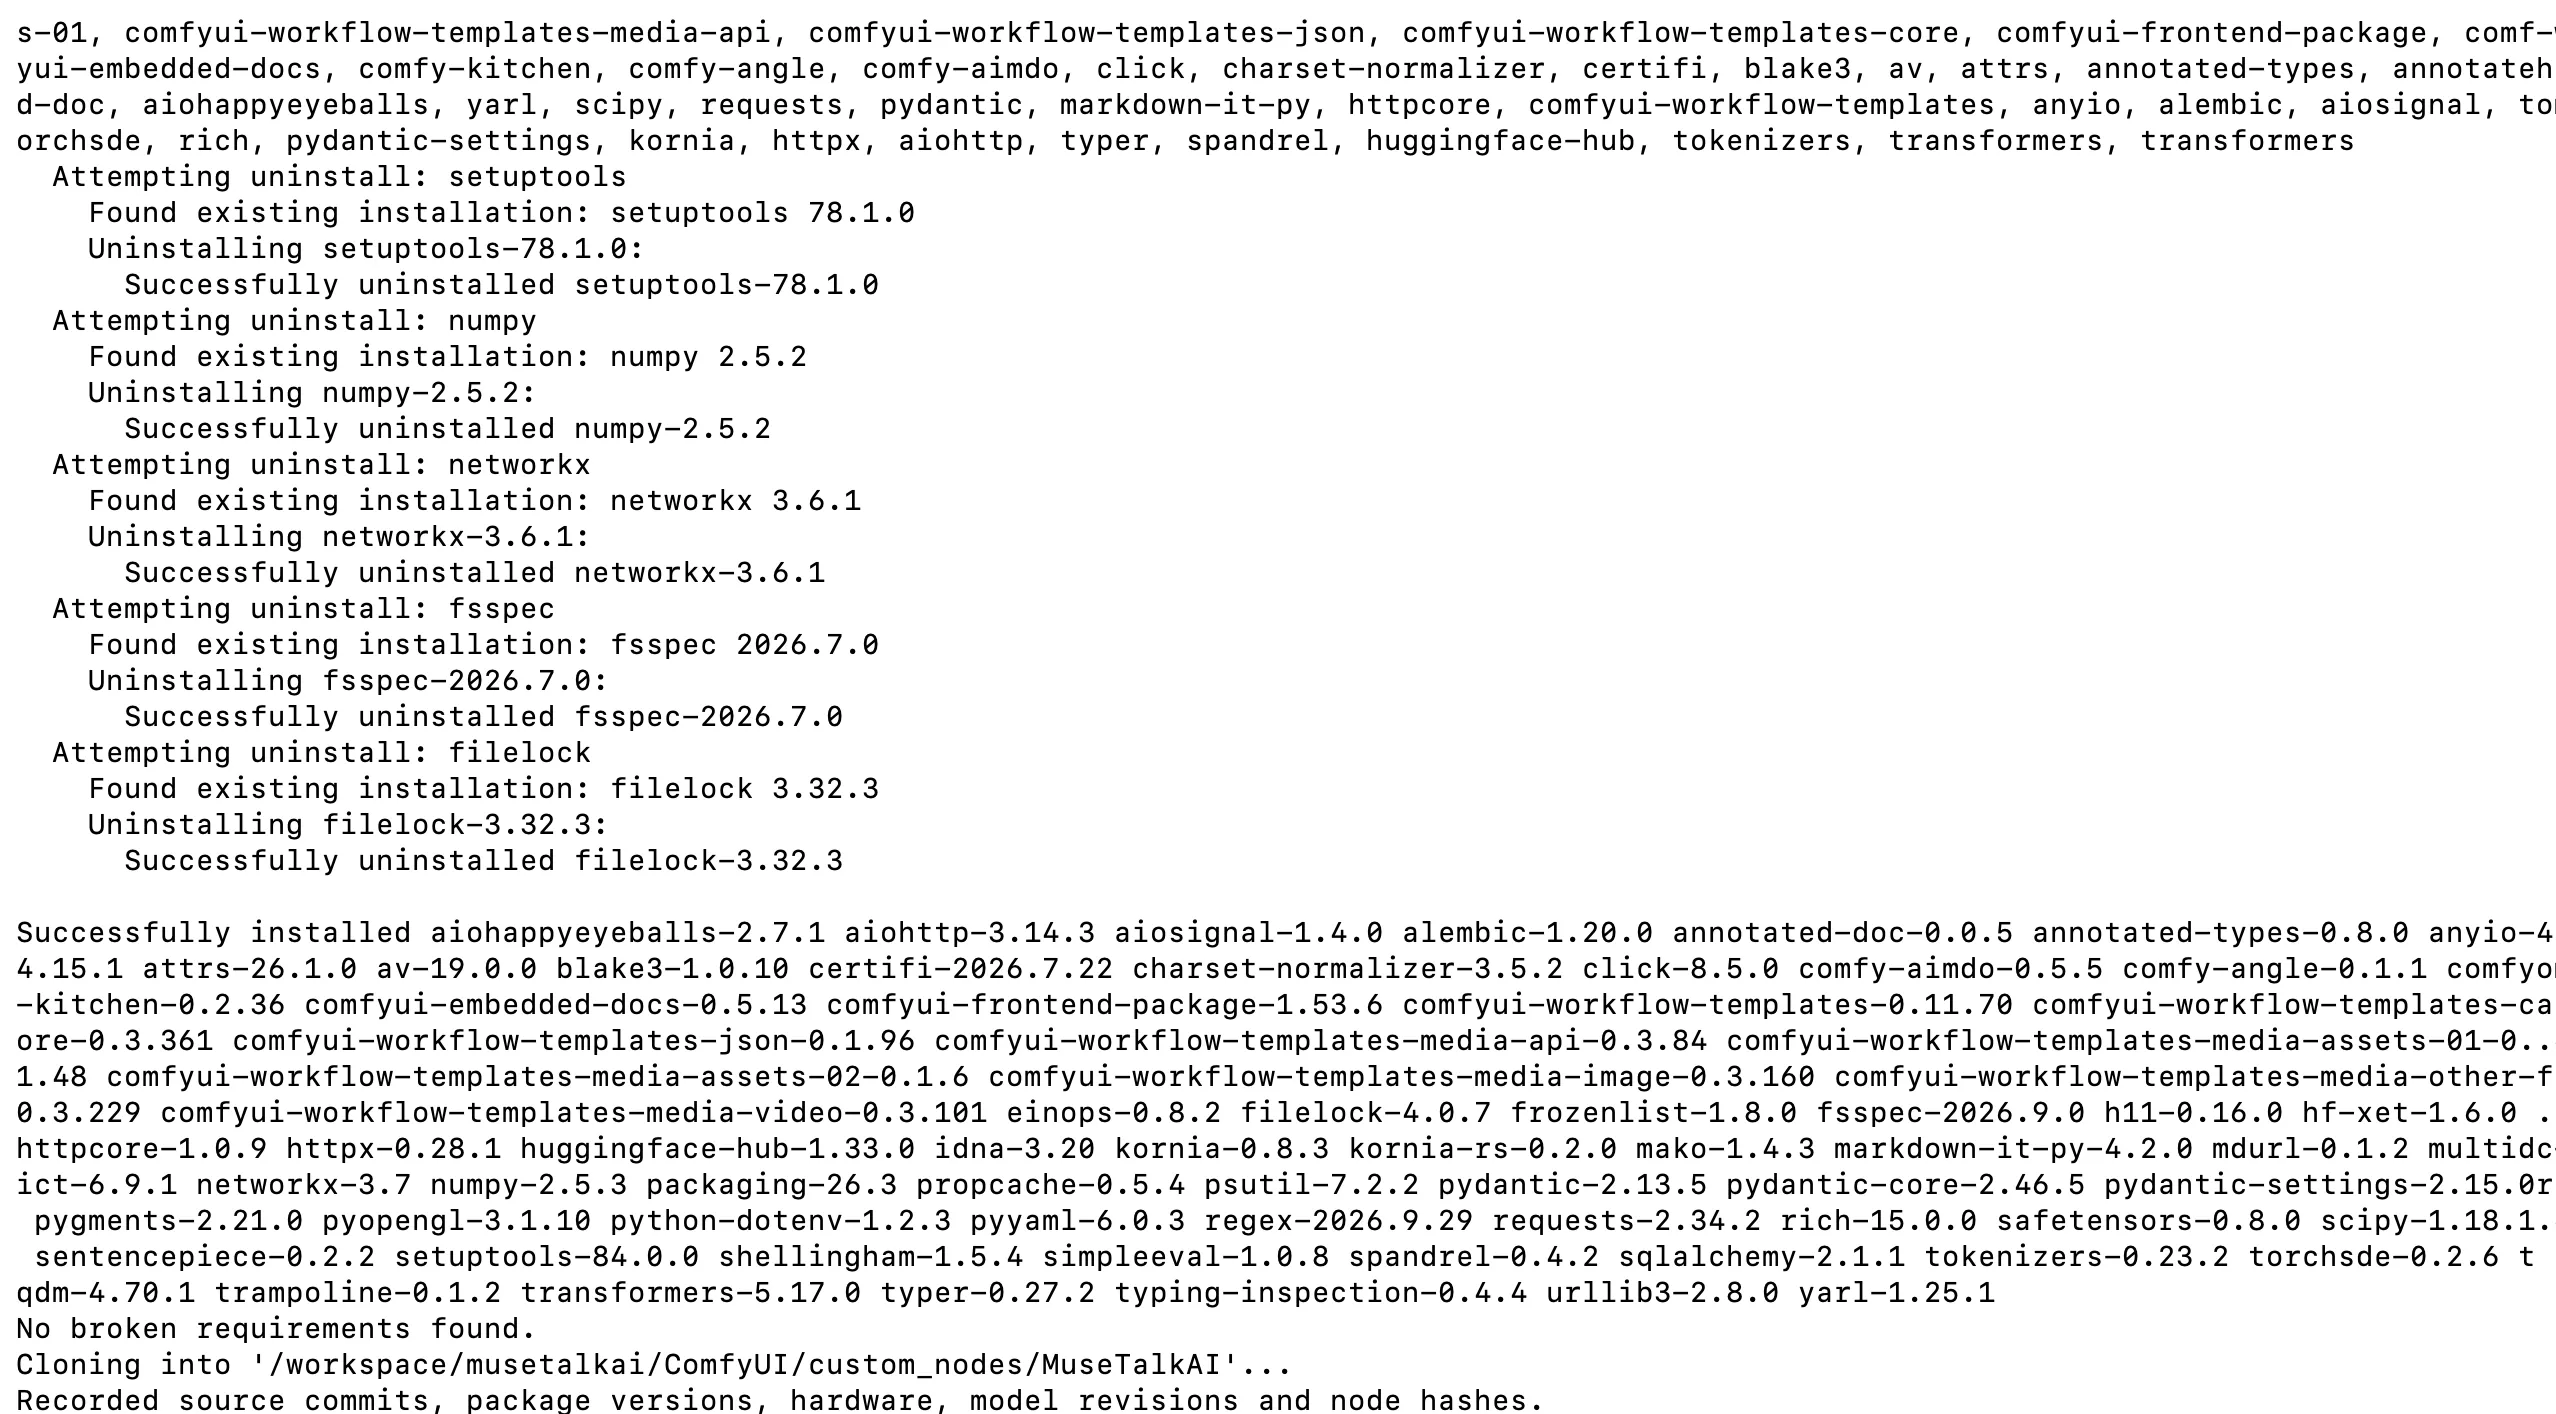
Execution Benchmark on NVIDIA RTX 4090 (24 GB VRAM): In our verified benchmark run, generating a complete 5-second 25 FPS video clip (125 rendered frames at 512×512 resolution) took approximately 123.5 seconds end-to-end. This includes face landmark detection via DWPose, Whisper audio latent extraction, diffusion UNet synthesis, and final FFmpeg video/audio re-multiplexing.
Step 9: Output Playback and Video Generation
When generation finishes, the completed video player activates directly inside the MuseTalk node. You can scrub playback with full audio synchronization, verify mouth movement, and click the Open button to save the MP4 to your computer.
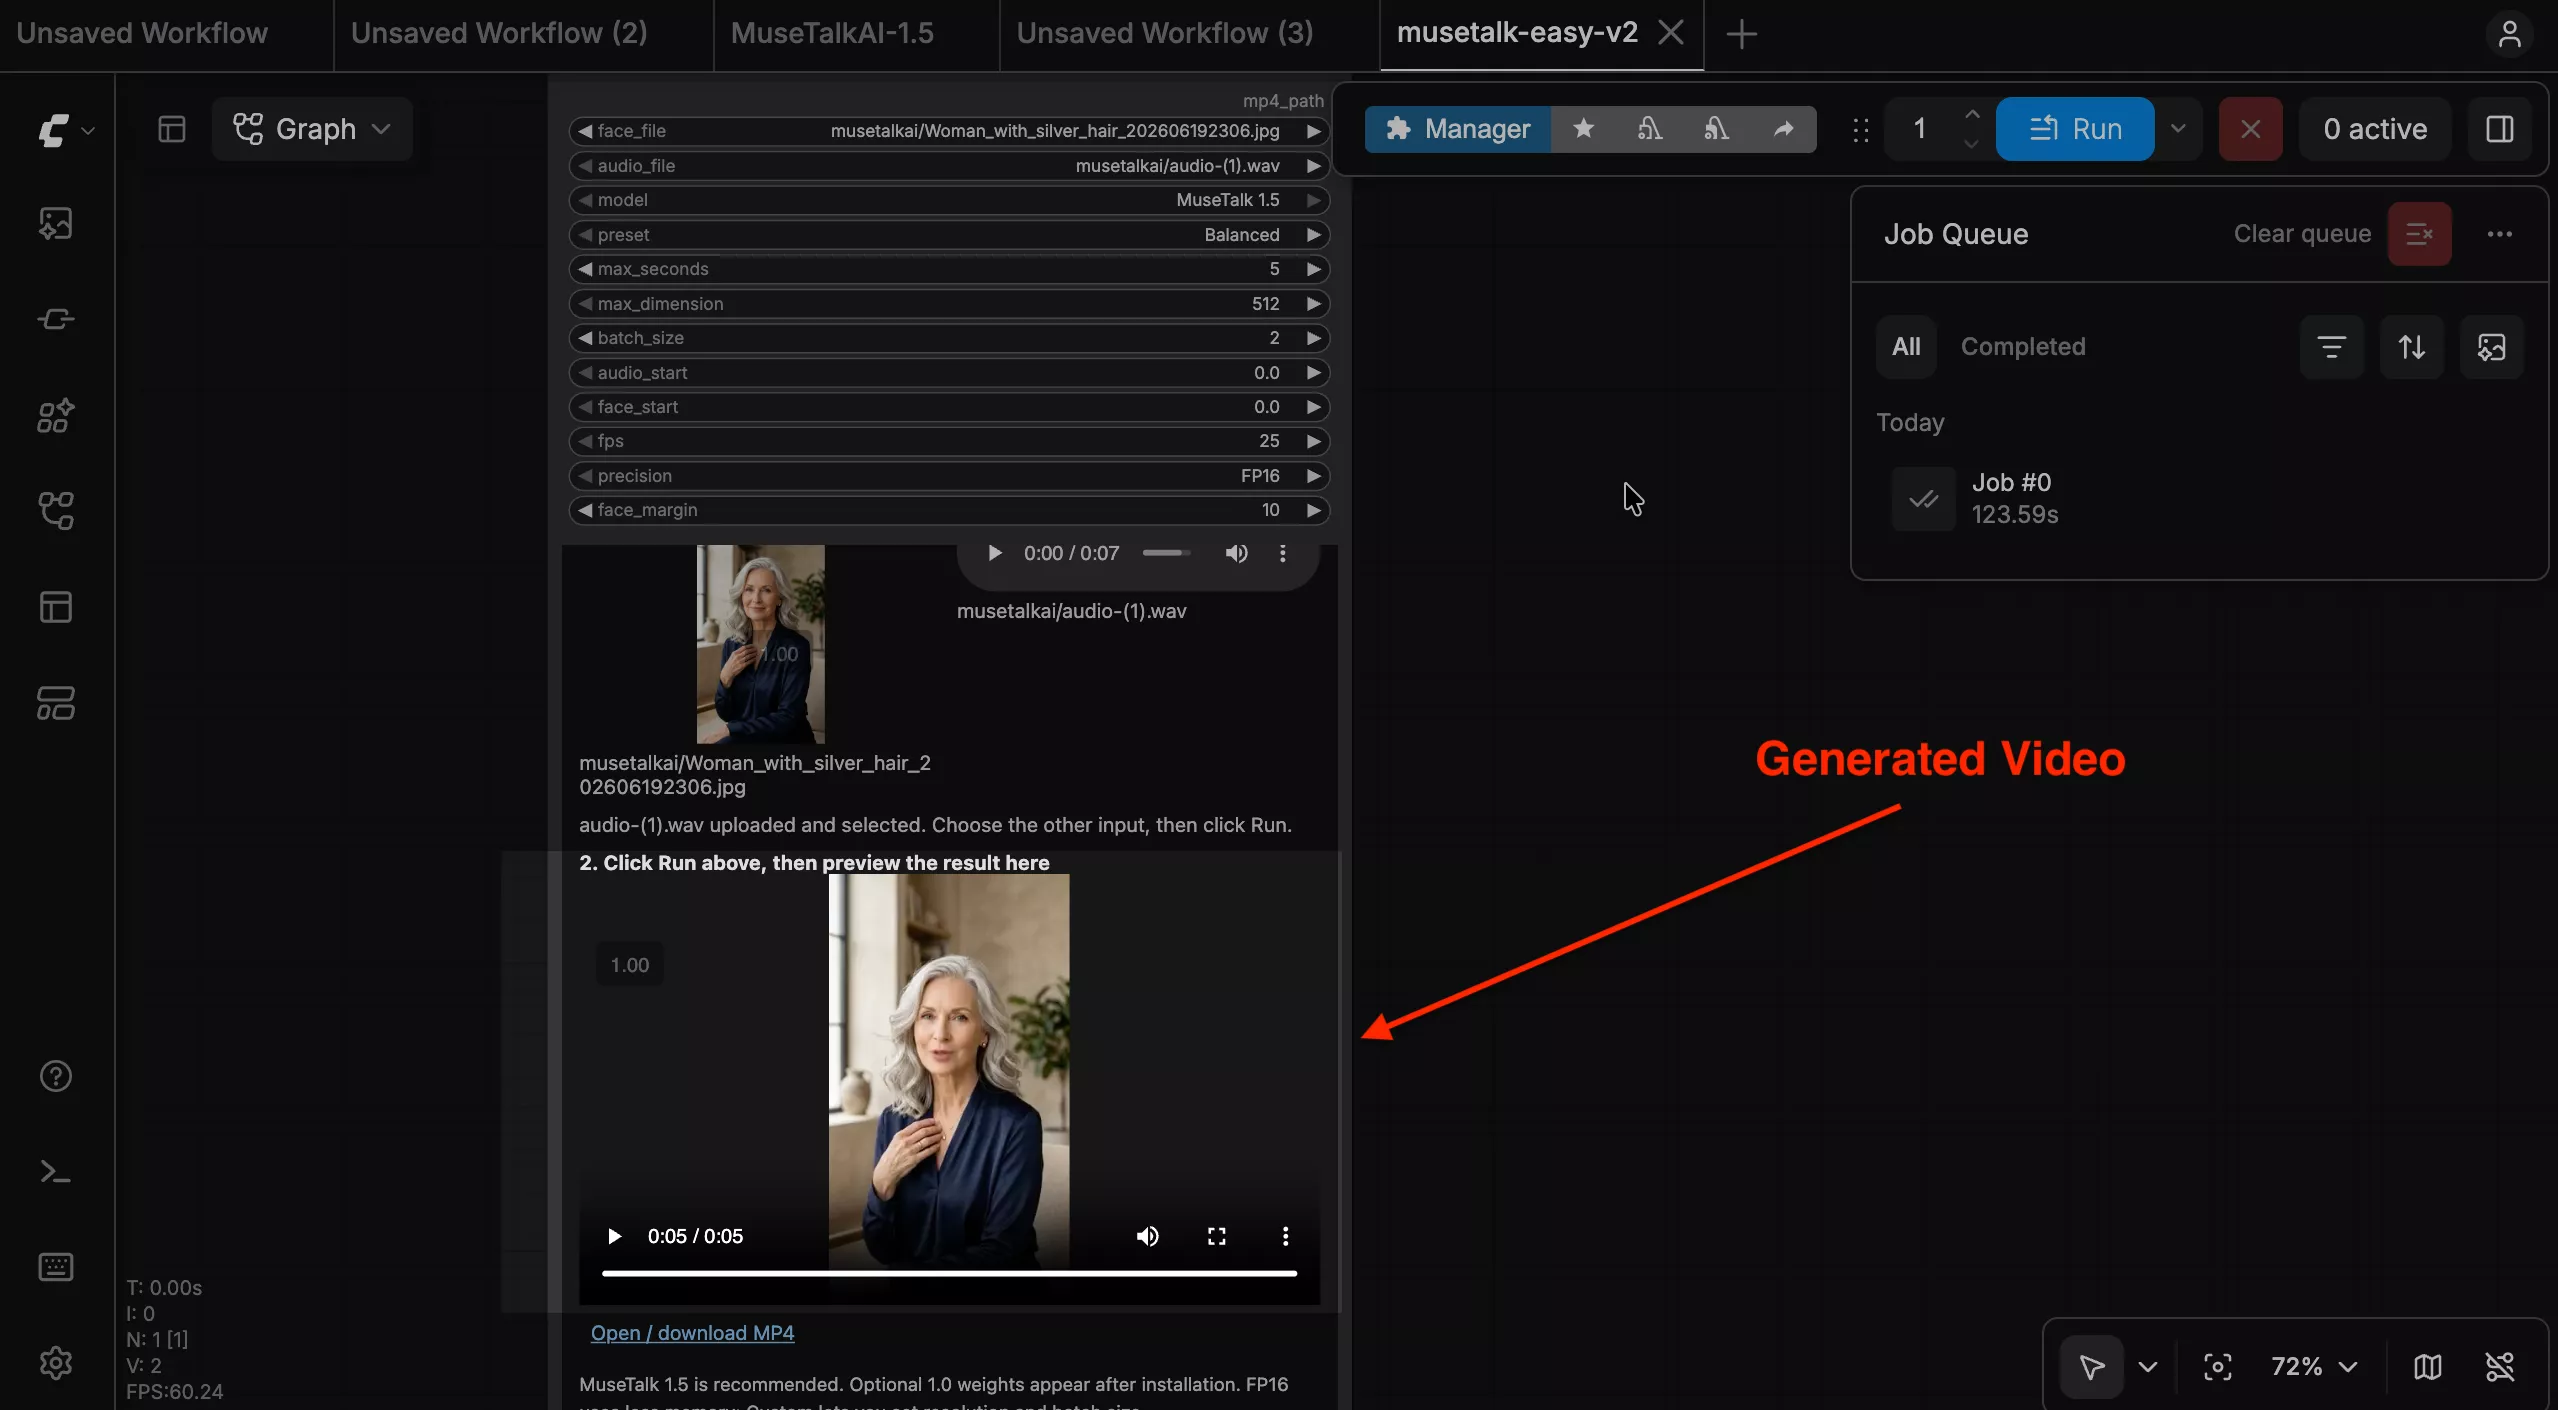
Generated videos are also preserved on your host filesystem under ComfyUI/output/musetalkai/<run_id>/result.mp4 along with complete runtime metadata in run.json.
Recorded Video Demonstration
Watch the complete end-to-end recording below showing instance verification on an RTX 4090, node configuration, input uploading, queue execution, and real-time playback:
Optional: MuseTalk 1.0 Legacy Model Comparison
By default, the model selector offers MuseTalk 1.5 because its weights are verified during initial setup. Checkpoints that are not present on disk are intentionally hidden to prevent execution errors.
If you want to compare outputs against legacy MuseTalk 1.0, you can get the 1.0 model weights (approximately 3.4 GB) into the isolated backend without affecting your 1.5 installation:
cd /workspace/musetalk-comfyui-easy-v2
MUSETALK_BASE=/workspace/musetalkai \
  /workspace/musetalkai/muse-env/bin/python download_legacy.py
Once done, click Refresh files / models in the ComfyUI node. MuseTalk 1.0 (legacy) will appear in the model dropdown. Do not attempt to rename a 1.5 checkpoint to 1.0; both versions utilize distinct UNet architectures.
Troubleshooting & Frequently Asked Questions
| Observed Issue | Root Cause | Resolution Step |
|---|---|---|
| Custom node missing or red box in canvas | ComfyUI server has not restarted after node installation, or custom node folder was extracted into an invalid path. | Ensure custom_nodes/MuseTalkAI exists and restart the ComfyUI server via Manager → Restart. Refresh your browser tab. |
| Upload buttons not visible in node | Browser has cached earlier JavaScript extensions or opened an older workflow. | Ensure you loaded musetalk-easy-v2.json and perform a hard refresh in Chrome (Ctrl+F5 or Cmd+Shift+R) to reload preview.js. |
| CUDA Out of Memory (OOM) | VRAM exhausted by high resolution inputs, concurrent diffusion models, or large batch sizes. | Switch preset to Low VRAM (batch size 1, FP16), reduce max_seconds to 5, and unload other checkpoints from ComfyUI memory. |
| No face detected in video / image | DWPose facial landmark detector could not locate a frontal face in the input media. | Use a clearly illuminated, front-facing portrait. Avoid extreme profile angles, excessive motion blur, or sunglasses. |
| Workflow JSON export missing media | Moving workflow JSON to another computer shows empty file fields or uninstalled models. | Workflow JSON files store graph connections, not binary weights or uploads. Install the backend and upload media on the target machine. |
| Upload failed error | Input file exceeds 50 MB upload UI limit or network connection interrupted. | Trim large audio/video files locally with FFmpeg prior to upload (see our FFmpeg Setup Guide). |
Summary & Next Steps
By encapsulating MuseTalk’s complex machine learning dependencies inside an isolated backend runtime while exposing an intuitive, single-node interface in ComfyUI, you achieve stable lip synchronization without endangering your primary ComfyUI setup. For further optimizations and batch workflows, explore our related guides: