Setting up MuseTalk the real-time, high-quality audio-driven lip synchronization system requires precise alignment across Python, PyTorch, CUDA, FFmpeg, MMLab packages, and several pretrained model weights. Because installation requirements diverge significantly across operating systems and hardware configurations, choosing the correct setup path before installing dependencies prevents the most common version conflicts and environment corruptions.
This guide provides a central Platform Selector to help you choose the best route for your operating system, followed by the complete, audited Step-by-Step Linux Installation Route (tested on Ubuntu with NVIDIA RTX GPUs), a dedicated Cloud GPU Setup Route (Vast.ai, RunPod, Lambda Labs), and direct links to our dedicated guides for Windows, macOS, ComfyUI, and the browser playground.
Platform Selector: Choose Your Setup Route
Review the matrix below to select the installation path that matches your operating system and hardware:
| Platform / Route | Hardware Requirement | Installation Route & Recommended Guide |
|---|---|---|
| Linux (Ubuntu / Debian) | NVIDIA GPU (≥8GB VRAM) | Native local installation. Follow the Step-by-Step Linux Route below on this page. |
| Windows (Native / WSL2) | NVIDIA GPU (≥8GB VRAM) + MSVC C++ Build Tools | Follow our dedicated standalone tutorial: How to Install MuseTalk on Windows: Complete Setup Guide. |
| macOS (Apple Silicon & Intel) | Apple Silicon (M1/M2/M3/M4) or Intel Mac | No native MPS support. Run via Google Colab, remote Cloud GPU, or test in browser via MuseTalk Playground. |
| Cloud GPU (Vast.ai / RunPod) | On-demand NVIDIA Cloud Instance (RTX 4090 / A100) | Pre-configured Linux container. Follow the Dedicated Cloud GPU Setup section below. |
| ComfyUI (Node-based UI) | NVIDIA GPU with ComfyUI installed | Node-based workflow integration. Follow our step-by-step guide: MuseTalk in ComfyUI: Full Setup Guide. |
| Zero-Install Playground | Any device with a modern browser | Instant test generation without any local dependencies. Try the MuseTalk Online Playground. |
Tested Environment & Hardware Requirements
Before beginning local installation on Linux or provisioning a cloud machine, verify that your host system meets the tested hardware and software baseline:
| Component | Tested / Recommended Specification | Minimum Supported |
|---|---|---|
| Operating System | Ubuntu 22.04 LTS / Ubuntu 20.04 LTS | Debian 11/12, modern 64-bit Linux distribution |
| GPU | NVIDIA GeForce RTX 4090 (24GB VRAM) | NVIDIA GPU with ≥8GB VRAM (RTX 3060, RTX 3080, RTX 3090, A5000, A100) |
| NVIDIA Driver | ≥525.60 (Verified on driver 550.x and 570.x) | ≥515.65 |
| CUDA Toolkit | CUDA 11.8 (or CUDA 12.1 with matching PyTorch wheels) | CUDA 11.7 |
| Python | Python 3.10.x (Strictly required) | Python 3.10 only (Do not use 3.11, 3.12, or 3.14) |
| System Packages | Git, FFmpeg (with libx264), Miniconda/Anaconda, build-essential | Standard build tools and FFmpeg binary |
| Storage | 35GB+ free space (weights, conda packages, video caches) | 20GB free space |
Verify Hardware Availability (`nvidia-smi`)
Open your terminal and confirm that your NVIDIA driver and GPU are correctly recognized:
nvidia-smi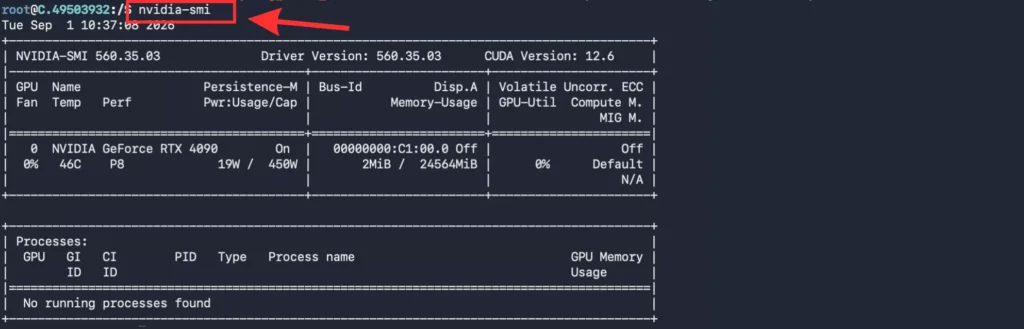
To print a compact hardware check:
nvidia-smi --query-gpu=name,memory.total,driver_version --format=csvExpected output for an RTX 4090:
name, memory.total [MiB], driver_version
NVIDIA GeForce RTX 4090, 24564 MiB, 550.54.14
Step-by-Step Linux Installation Route
Follow these steps in sequence from inside your Linux terminal. Adhering strictly to the exact versions prevents dependency conflicts across PyTorch, MMLab, and Hugging Face packages.
Step 1: Install System Packages and FFmpeg
MuseTalk requires Git to clone source code, FFmpeg for audio demuxing and video recombining, wget for downloads, and standard C/C++ compilation tools:
sudo apt update && sudo apt install -y git ffmpeg wget build-essential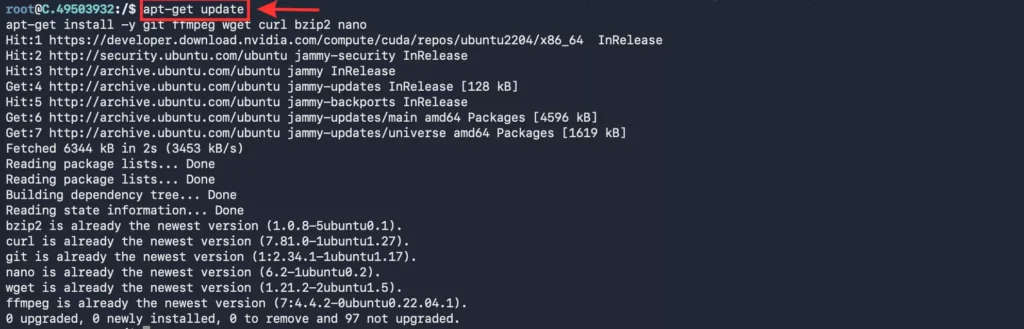
Verify that FFmpeg is accessible in your system PATH:
ffmpeg -version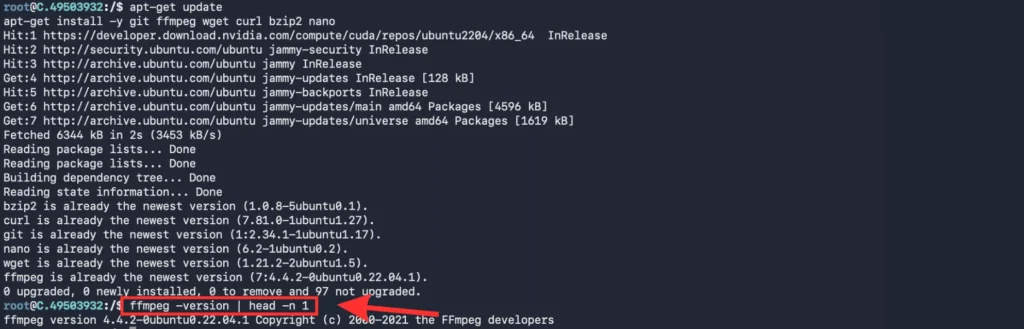
For detailed verification or custom build options, refer to our dedicated guide on How to Setup FFmpeg for MuseTalk (Windows and Linux).
Step 2: Create an Isolated Python 3.10 Conda Environment
Do not use system Python. MuseTalk relies on specific versions of MMLab packages that require Python 3.10. Python 3.11+ and Python 3.14 break wheel compilation for older MMLab packages.
Create and activate the environment:
conda create -n musetalk python=3.10 -y
conda activate musetalk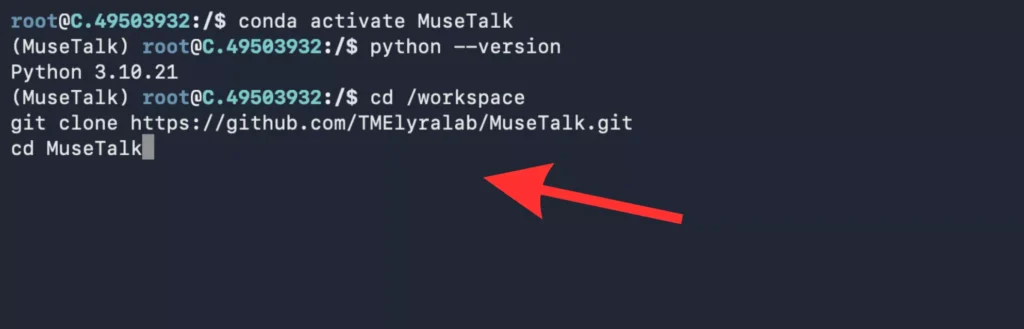
Verify that your active Python interpreter reports version 3.10:
python --version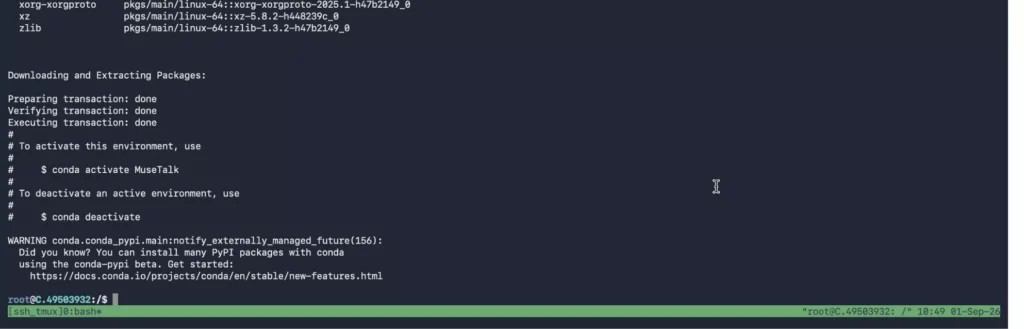
Step 3: Install PyTorch 2.0.1 with CUDA 11.8 Support
MuseTalk 1.5 is validated against PyTorch 2.0.1 with CUDA 11.8. Install the official wheels using pip:
pip install torch==2.0.1 torchvision==0.15.2 torchaudio==2.0.2 --index-url https://download.pytorch.org/whl/cu118Verify PyTorch and CUDA binding immediately before proceeding:
python -c "import torch; print('PyTorch Version:', torch.__version__, '| CUDA Available:', torch.cuda.is_available(), '| Device:', torch.cuda.get_device_name(0) if torch.cuda.is_available() else 'N/A')"Expected output:
PyTorch Version: 2.0.1+cu118 | CUDA Available: True | Device: NVIDIA GeForce RTX 4090Step 4: Clone the MuseTalk Repository and Install Base Dependencies
Clone the official repository and install the standard requirements:
git clone https://github.com/TMElyralab/MuseTalk.git
cd MuseTalk
pip install -r requirements.txt
Step 5: Install MMLab Packages (OpenMIM, MMCV, MMPose & Chumpy)
MuseTalk uses OpenMIM to install MMCV and MMPose. Run these commands sequentially inside your active `musetalk` conda environment:
pip install --no-cache-dir -U openmim
mim install mmengine
mim install "mmcv>=2.0.1"
mim install "mmpose>=1.1.0"
Important Chumpy Fix: When installing `chumpy`, pip may fail with ModuleNotFoundError: No module named 'pip' if build isolation is enabled. Install `chumpy` explicitly with no build isolation:
pip install chumpy --no-build-isolationStep 6: Pin Hugging Face Hub (<1.0) and Clean Conflict Packages
Recent versions of `huggingface-hub` (≥1.0.0) introduce breaking changes with older Transformers releases used by MuseTalk. Pin `huggingface-hub` to version 0.30.2:
pip install "huggingface_hub[cli]==0.30.2"Additionally, remove any conflicting OpenXLab or OpenDataLab packages if present, as they can interfere with automated weight verification:
pip uninstall -y opendatalab openxlabNote on xformers: Do not upgrade to modern xformers wheels, as newer releases require PyTorch 2.2+ which breaks MuseTalk’s MMLab dependencies.
Step 7: Download and Organize Model Weights
MuseTalk requires multiple supporting models in addition to its own network weights. All model files must sit in an exact folder layout inside the models/ directory at the root of your cloned repository.
Which download method should I use?
- Automated Script Method: Best for a fresh standalone installation when the repository script and its prerequisites run without issues in your environment.
- Individual / Manual Method: Best for missing files, failed script downloads, restricted networks, or downloading only the files needed for a specific version.
Choose one method. You do not need to download everything twice. Both methods produce the identical required folder layout for the selected version. Run all commands from the root MuseTalk/ directory with the musetalk conda environment active.
Because this guide uses a pinned environment with huggingface_hub==0.30.2, the targeted individual CLI download route is documented below as the primary choice. This route installs exactly what is needed for MuseTalk 1.5 without altering your pinned packages.
Create the required destination folders:
mkdir -p models/musetalkV15 models/sd-vae models/whisper models/dwpose models/syncnet models/face-parse-bisentDownload each component to its designated folder:
# 1. MuseTalk 1.5 weights (UNet model and config)
huggingface-cli download TMElyralab/MuseTalk musetalkV15/musetalk.json musetalkV15/unet.pth --local-dir models

# 2. SD-VAE weights (diffusers accepts either .bin or .safetensors; .bin matches official scripts)
huggingface-cli download stabilityai/sd-vae-ft-mse config.json diffusion_pytorch_model.bin --local-dir models/sd-vae

# 3. Whisper Tiny weights (audio feature extractor)
huggingface-cli download openai/whisper-tiny config.json pytorch_model.bin preprocessor_config.json --local-dir models/whisper

# 4. DWPose weights (face landmark estimation)
huggingface-cli download yzd-v/DWPose dw-ll_ucoco_384.pth --local-dir models/dwpose

# 5. SyncNet weights (optional for inference; required for training and sync evaluation)
huggingface-cli download ByteDance/LatentSync latentsync_syncnet.pt --local-dir models/syncnet

# 6. Face Parse weights (both 79999_iter.pth and resnet18 backbone from official sources)
gdown --id 154JgKpzCPW82qINcVieuPH3fZ2e0P812 -O models/face-parse-bisent/79999_iter.pth
curl -L https://download.pytorch.org/models/resnet18-5c106cde.pth -o models/face-parse-bisent/resnet18-5c106cde.pth
Note for Face Parse: If Google Drive rate limits prevent gdown from downloading 79999_iter.pth, you can download it via the community Hugging Face mirror used by the official Windows script: huggingface-cli download ManyOtherFunctions/face-parse-bisent 79999_iter.pth --local-dir models/face-parse-bisent.
Alternative Script Method (Linux Bash): If you prefer running the official automated download script instead of individual commands, install its prerequisites and execute:
pip install -U "huggingface_hub[cli]" gdown
bash download_weights.sh
Verify that all model files are present and match the expected folder layout:
find ./models -type f -exec ls -lh {} +Your models/ directory should reflect this layout:
./models/
├── musetalkV15/
│   ├── musetalk.json
│   └── unet.pth
├── sd-vae/
│   ├── config.json
│   └── diffusion_pytorch_model.bin
├── whisper/
│   ├── config.json
│   ├── pytorch_model.bin
│   └── preprocessor_config.json
├── dwpose/
│   └── dw-ll_ucoco_384.pth
├── syncnet/                     # Optional for standard inference
│   └── latentsync_syncnet.pt
└── face-parse-bisent/
    ├── 79999_iter.pth
    └── resnet18-5c106cde.pth
For full file details, manual browser download links, Windows setup commands, and legacy MuseTalk 1.0 setup, refer to our detailed reference: MuseTalk Model Downloads: Files & Folder Setup.
Before continuing: MuseTalk 1.5 needs 10 files across musetalkV15, sd-vae, whisper, dwpose, and face-parse-bisent. Keep the configuration files beside their weights. For the VAE, use config.json plus either diffusion_pytorch_model.bin or diffusion_pytorch_model.safetensors. The legacy models/musetalk/ pair and models/syncnet/latentsync_syncnet.pt are optional for standard v1.5 inference.
Check the required-file manifest and file verification steps before launching. The v1.5 unet.pth is 3,400,074,924 bytes (about 3.40 GB); Whisper’s preprocessor_config.json is 184,990 bytes. A directory listing or a script’s success message alone does not prove that downloads are complete. Compare sizes and, for binary weights, SHA-256 hashes with the linked source revision.
Step 8: Prepare Input Files
Before running inference, confirm your input files adhere to MuseTalk requirements:
- Video: Framerate must be exactly 25 FPS. Face should occupy the central region without extreme occlusion.
- Audio: 16kHz mono WAV format recommended for optimal Whisper feature extraction.
Convert any input video to 25 FPS using FFmpeg:
ffmpeg -i input_video.mp4 -r 25 -c:v libx264 -pix_fmt yuv420p data/video/test_25fps.mp4Convert your audio to 16kHz WAV:
ffmpeg -i input_audio.mp3 -ar 16000 -ac 1 data/audio/test_16k.wavStep 9: First-Run Validation & Output Verification
Execute test inference using the MuseTalk 1.5 weights downloaded in Step 7. Explicitly supply the version, UNet model path, and configuration file to match the downloaded checkpoint:
python -m scripts.inference \
  --inference_config configs/inference/test.yaml \
  --result_dir results/test_run \
  --unet_model_path models/musetalkV15/unet.pth \
  --unet_config models/musetalkV15/musetalk.json \
  --version v15
Alternatively, you can run the repository inference helper script:
sh inference.sh v1.5 normal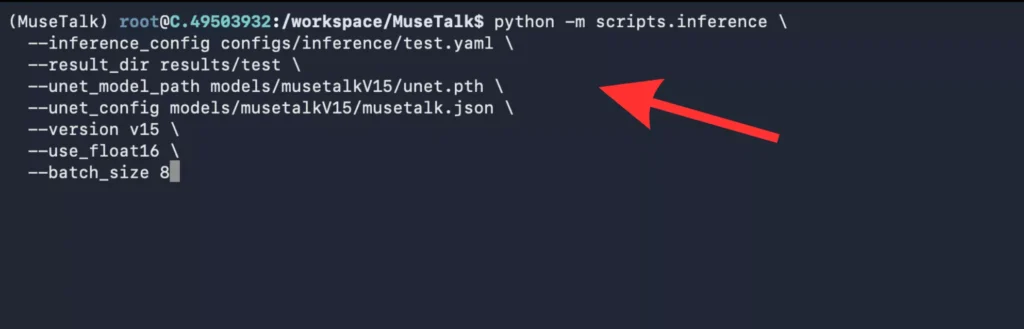
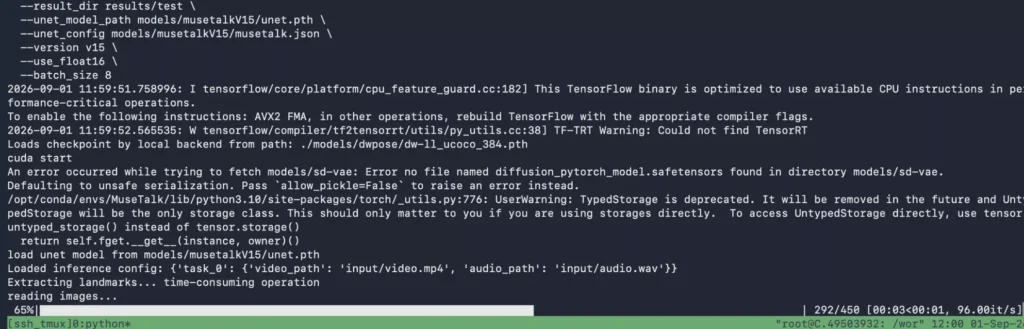
During inference, the pipeline extracts DWPose face keypoints, computes Whisper audio latents, and renders frames:
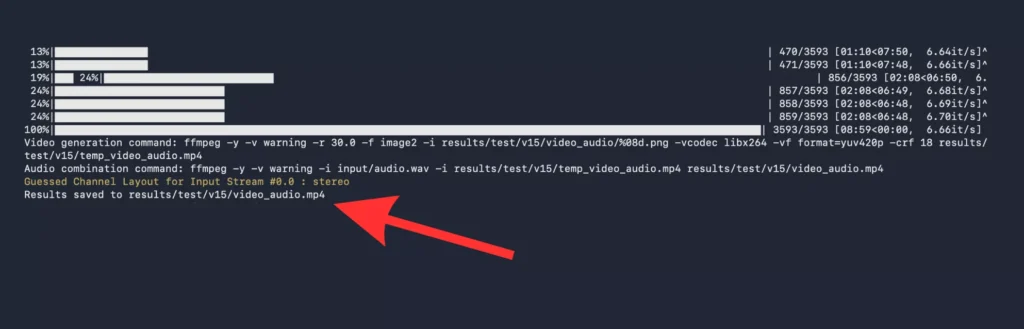
When generation completes, the final lip-synced MP4 file is written to the results directory:
Benchmark Timing on RTX 4090: Rendering a 5-second 25fps video clip takes approximately 2.5 to 3.5 seconds on an NVIDIA RTX 4090, achieving real-time performance (~30+ fps throughput).
Step 10: Additional Launch Options
Real-Time Headless Inference:
python -m scripts.realtime_inference \
  --inference_config configs/inference/realtime.yaml \
  --result_dir results/realtime \
  --unet_model_path models/musetalkV15/unet.pth \
  --unet_config models/musetalkV15/musetalk.json \
  --version v15
Alternatively, run the real-time helper script: sh inference.sh v1.5 realtime.
Gradio Web Interface:
python app.pyFor step-by-step guidance on running and navigating the web interface, see our tutorial on How to Use the MuseTalk Gradio Web Demo.
Dedicated Cloud GPU Setup (Vast.ai, RunPod, Lambda Labs)
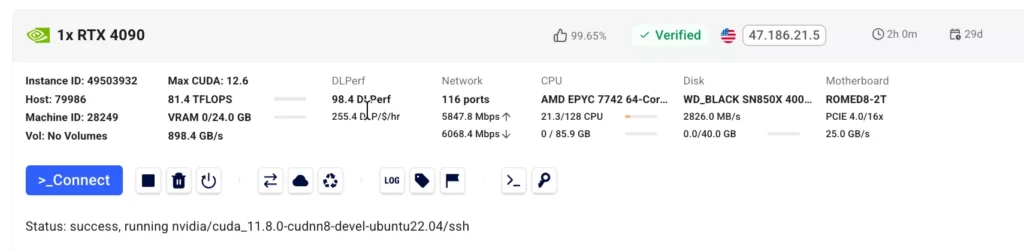
If you do not have a local NVIDIA GPU with at least 8GB to 24GB of VRAM, renting an on-demand cloud GPU instance is the most practical option. A single NVIDIA RTX 4090 24GB instance typically costs between $0.30 and $0.50 per hour and provides full hardware acceleration.
Recommended Cloud Instance Specifications
- GPU: 1 × NVIDIA RTX 4090 (24GB VRAM) or RTX 3090 (24GB VRAM)
- Base Image: PyTorch 2.0.1 / CUDA 11.8 Ubuntu 22.04 base template
- Disk Allocation: Minimum 35GB to 50GB allocated storage on
/workspace
Connecting to Your Cloud Instance via SSH
Before starting your instance, add your local computer’s public SSH key (e.g. ~/.ssh/id_rsa.pub or ~/.ssh/id_ed25519.pub) to your cloud provider account under SSH Keys.
Connect from your terminal using the assigned port and IP address:
ssh -p PORT root@IP_ADDRESSAlways execute your installation commands inside the persistent storage volume (typically /workspace on Vast.ai and RunPod):
cd /workspaceAccept Conda Terms of Service (Vast.ai Specific)
When running on certain pre-configured Vast.ai cloud images, conda may require accepting their updated Terms of Service on first use:
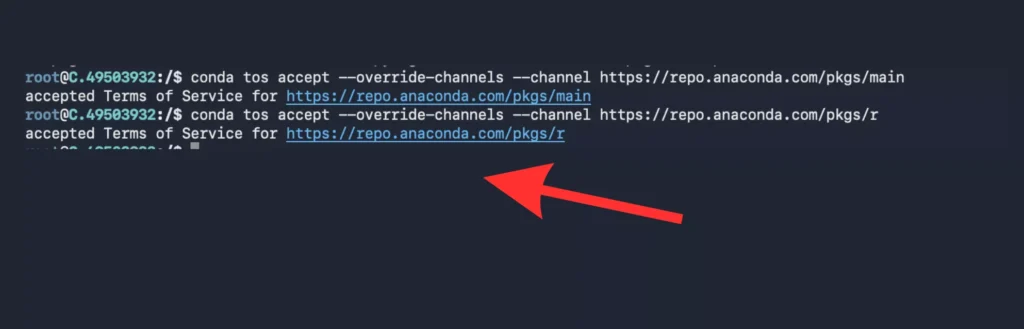
Accept the prompt by entering `yes` when prompted, or run:
conda config --set auto_activate_base falseOnce connected and inside /workspace, execute the exact same steps detailed in the Step-by-Step Linux Route above.
Transferring Input and Output Files via SCP
To upload local video and audio files from your computer to the cloud instance:
# Upload input video
scp -P PORT /path/to/my_face.mp4 root@IP_ADDRESS:/workspace/MuseTalk/data/video/

# Upload input audio
scp -P PORT /path/to/my_audio.wav root@IP_ADDRESS:/workspace/MuseTalk/data/audio/
To download the generated result video back to your local computer:
scp -P PORT root@IP_ADDRESS:/workspace/MuseTalk/results/test_run/output.mp4 ~/Downloads/musetalk_result.mp4Quick Symptom Links & Troubleshooting
If you encounter an issue during installation or first-run inference, consult the quick symptom checks below:
| Observed Error / Symptom | Underlying Cause | Verified Fix Command / Action |
|---|---|---|
ModuleNotFoundError: No module named 'pip' during chumpy install |
Pip build isolation cannot locate internal build dependencies in older chumpy package | Run: pip install chumpy --no-build-isolation |
ImportError: cannot import name 'get_device_name' from 'torch' or MMCV crash |
Mismatched PyTorch / MMCV version matrix or missing compilation wheels | Reinstall MMCV strictly via OpenMIM: mim install "mmcv>=2.0.1" inside Python 3.10. |
huggingface_hub version conflicts or hf: command not found |
Hugging Face Hub 1.x deprecates legacy subcommands used by Transformers pin | Install pinned hub: pip install "huggingface_hub[cli]==0.30.2" and call huggingface-cli. |
FileNotFoundError: models/musetalkV15/... or empty weights |
Weights downloaded into nested folders (e.g. models/models/...) or incomplete transfer |
Verify paths with find ./models -type f against the Model Setup Guide. |
ffmpeg: command not found or audio muxing failure |
FFmpeg missing from system PATH or Conda environment | Install system package: sudo apt install -y ffmpeg (see our FFmpeg Setup Guide). |
RuntimeError: CUDA out of memory (OOM) |
VRAM exhausted by high resolution input or large batch size | Downscale input video to 720p or 512×512, reduce batch size in inference config, or close background GPU tasks. |
ValueError: No face detected in video |
DWPose unable to find facial landmarks in video frames | Ensure head is visible and well-lit. Avoid profile-only poses or extreme facial occlusion. |